Sep 14th 2023
Photographers and photography enthusiasts know that capturing the moment is only half the journey to creating the perfect picture. To truly bring out the magic in your photos, it is essential to master the art of photo editing. Fortunately, you can make all the edits you need directly within the Mimeo Photos for Mac app, thanks to our deep integration with Apple Photos. In this blog post, we’ll take you through the ins and outs of editing your photos, from basic adjustments to pro-level enhancements.
Editing Basics
Whether you’re experienced with photo editing or just getting started, these basic edits are ones you won’t want to skip. When you’re building your project within the Mimeo Photos for Mac app, click on the photo you’d like to edit and then click on the Edit button. Here within the Apple Photos editor, you can begin making adjustments.
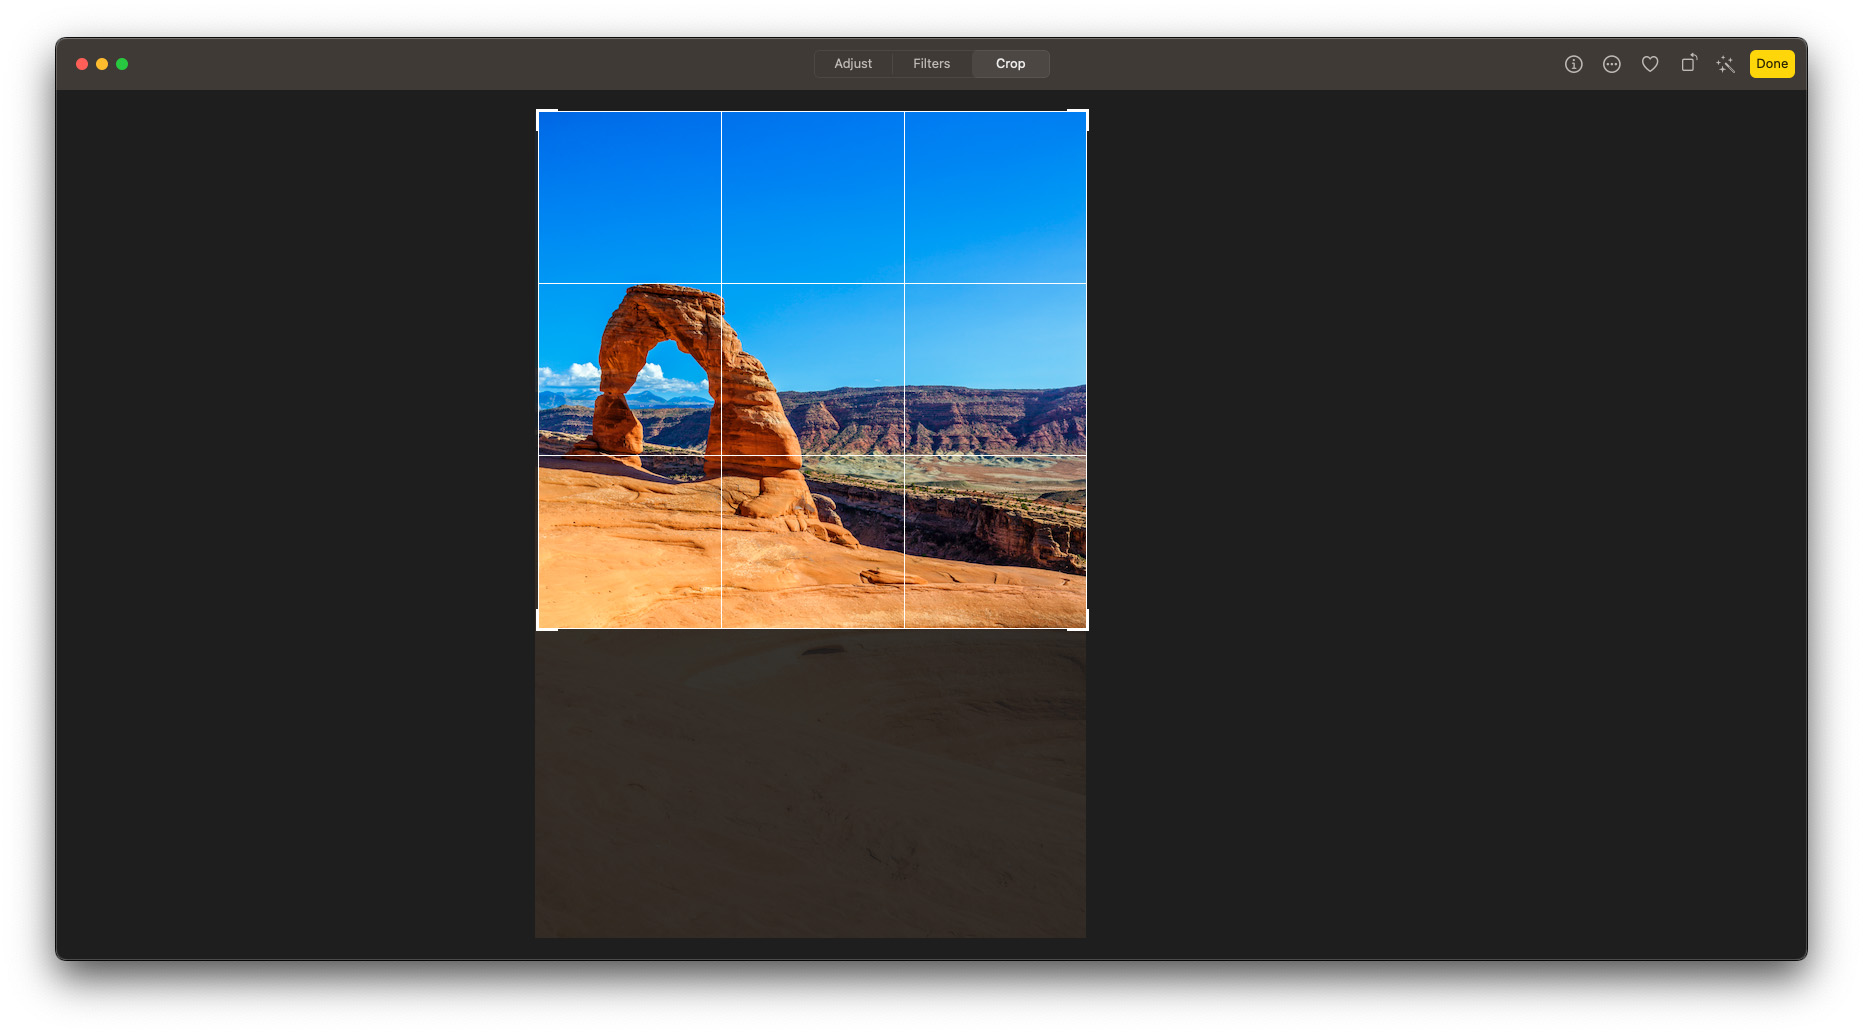
Crop
The first step in crafting a captivating photo is framing it just right. With the Crop tool, you can trim away unnecessary distractions and reposition your subject for a more balanced composition. Just click the Crop button at the top of your screen, then you can manually crop your photo with the Freeform option or choose from pre-set aspect ratios under the Aspect section.
Straighten
If you’ve ever shot the perfect photo, only to find that it wasn’t exactly straight after the fact, this adjustment is going to become your best friend. Move the Straighten sliders to the right or left to straighten your image. If the perspective is slightly off, move the Vertical and/or Horizontal sliders to adjust.
Intermediate Edits
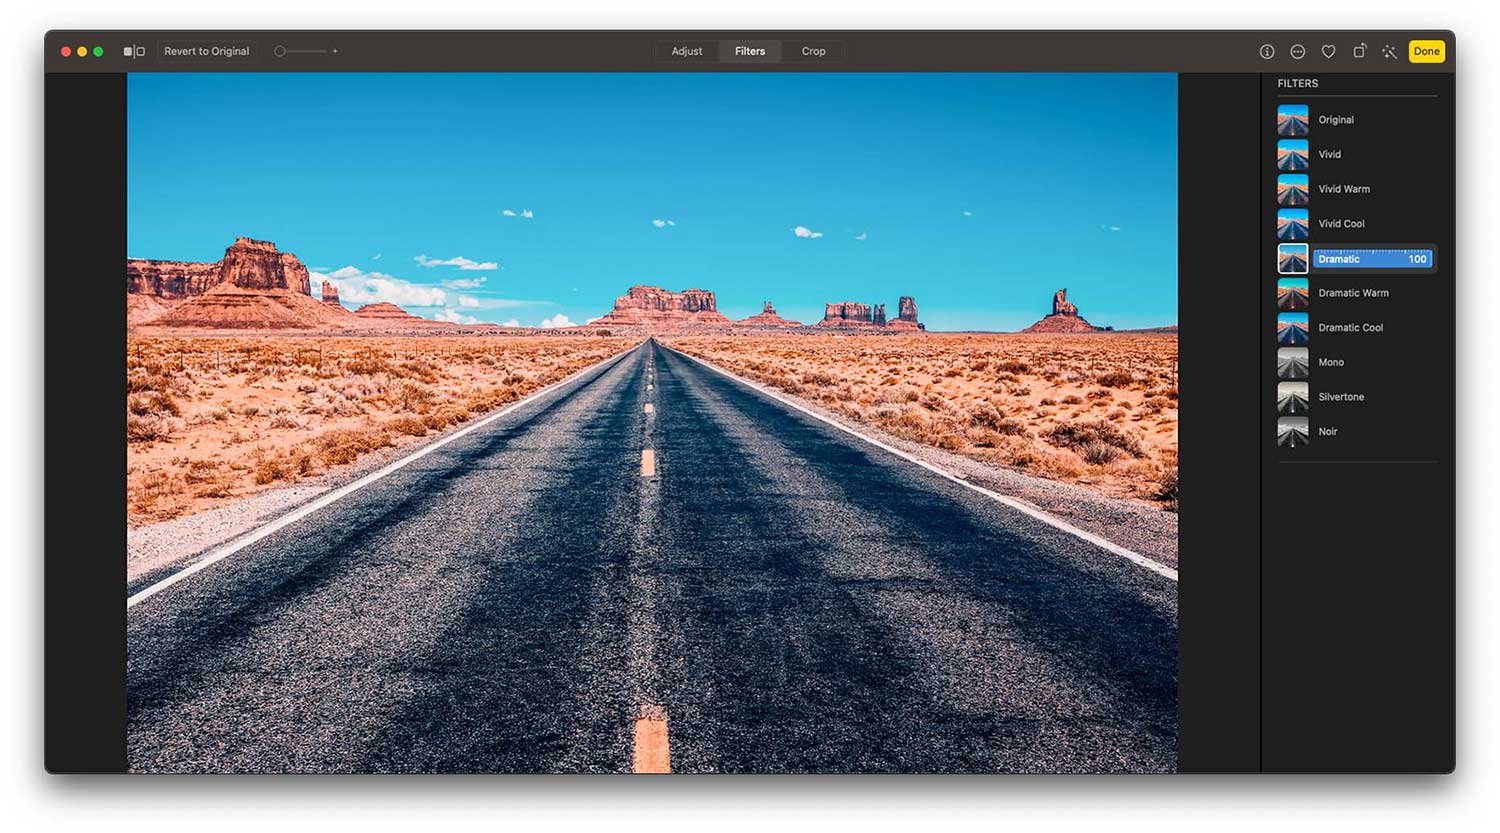
Apple Photos offers 10 different pre-set filters that will automatically enhance your photo. From vibrant vintage effects to elegant black and white tones, these filters give your photos a unique and eye-catching look. Explore the different filters to see what effect each has on your image. You can adjust the intensity of the filters by clicking on the filter name and moving the slider to the left.
Pro-Level Adjustments
Although filters can be great for quick and easy edits, sometimes you’ll want to take matters into your own hands so you can fine tune each aspect of your photo. That’s when you’ll click the Adjust button at the top of your screen. Here you’ll have ultimate control over all of the adjustments of your photo.
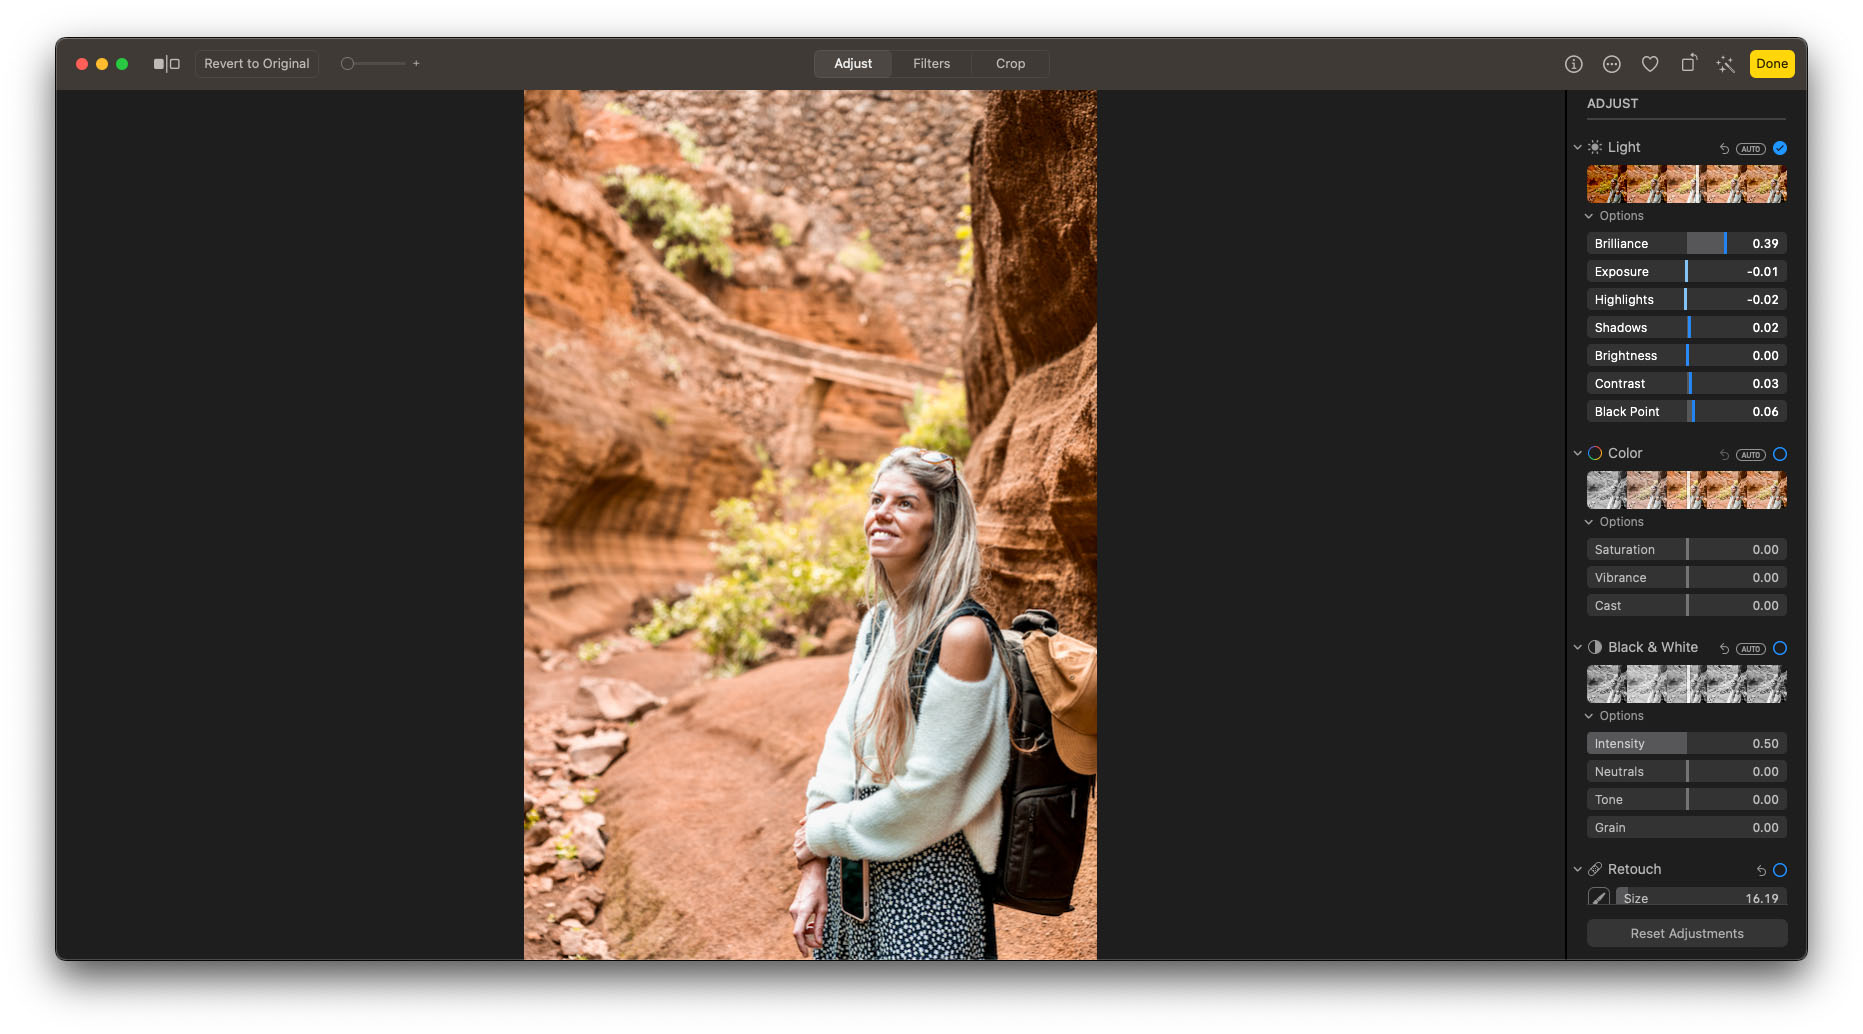
Light
Use the slider to adjust how dark or light your photo appears. Further enhance your adjustments under the Options drop-down, where you can modify brilliance, exposure, highlights, shadows, brightness, contrast, and black point.
Color
Make your photo extra vibrant or completely desaturated by moving the slider to the left or right. Under the Options drop-down, you can continue to fine-tune the color through saturation, vibrance, and cast.
Black & White
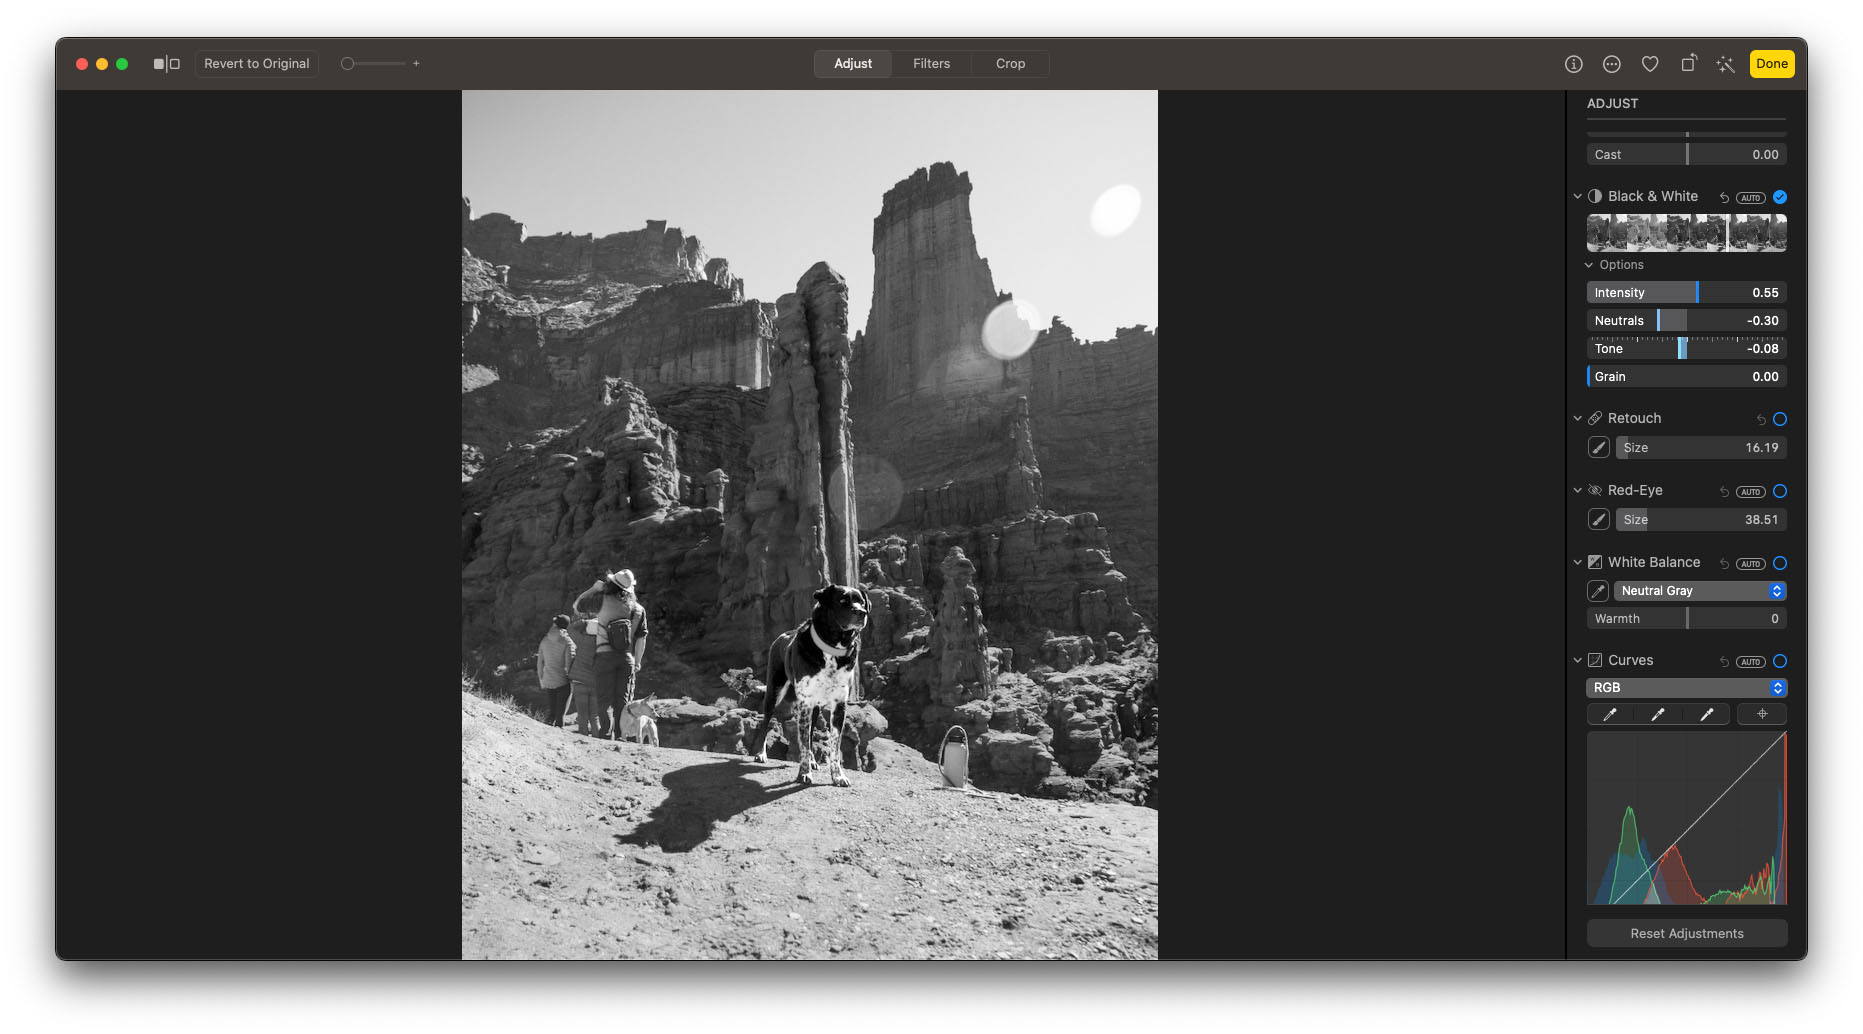
If you’re going for the black and white look for your photo, this adjustment will take your image to the next level. Use the Options drop-down to alter the intensity, how neutral colors look, the overall tone of your photo, and how much grain you want to show.
Retouch & Red-Eye
Remove blemishes with the Retouch tool by moving the slider to the size of the blemish you’d like to remove, then either click and drag over spots to remove them or option-click to choose a source area to copy over the area you’re covering. For red-eye removal, select the size of your brush and click on the red-eye in your photo to remove.
White Balance
Ensure the colors of your photo are accurate using this adjustment. Set the white balance by selecting a neutral gray, skin tone, or temperature/tint. For each, you can choose the Eyedropper tool and select a corresponding area on your photo to set as the white balance, then make additional modifications with the sliders below.
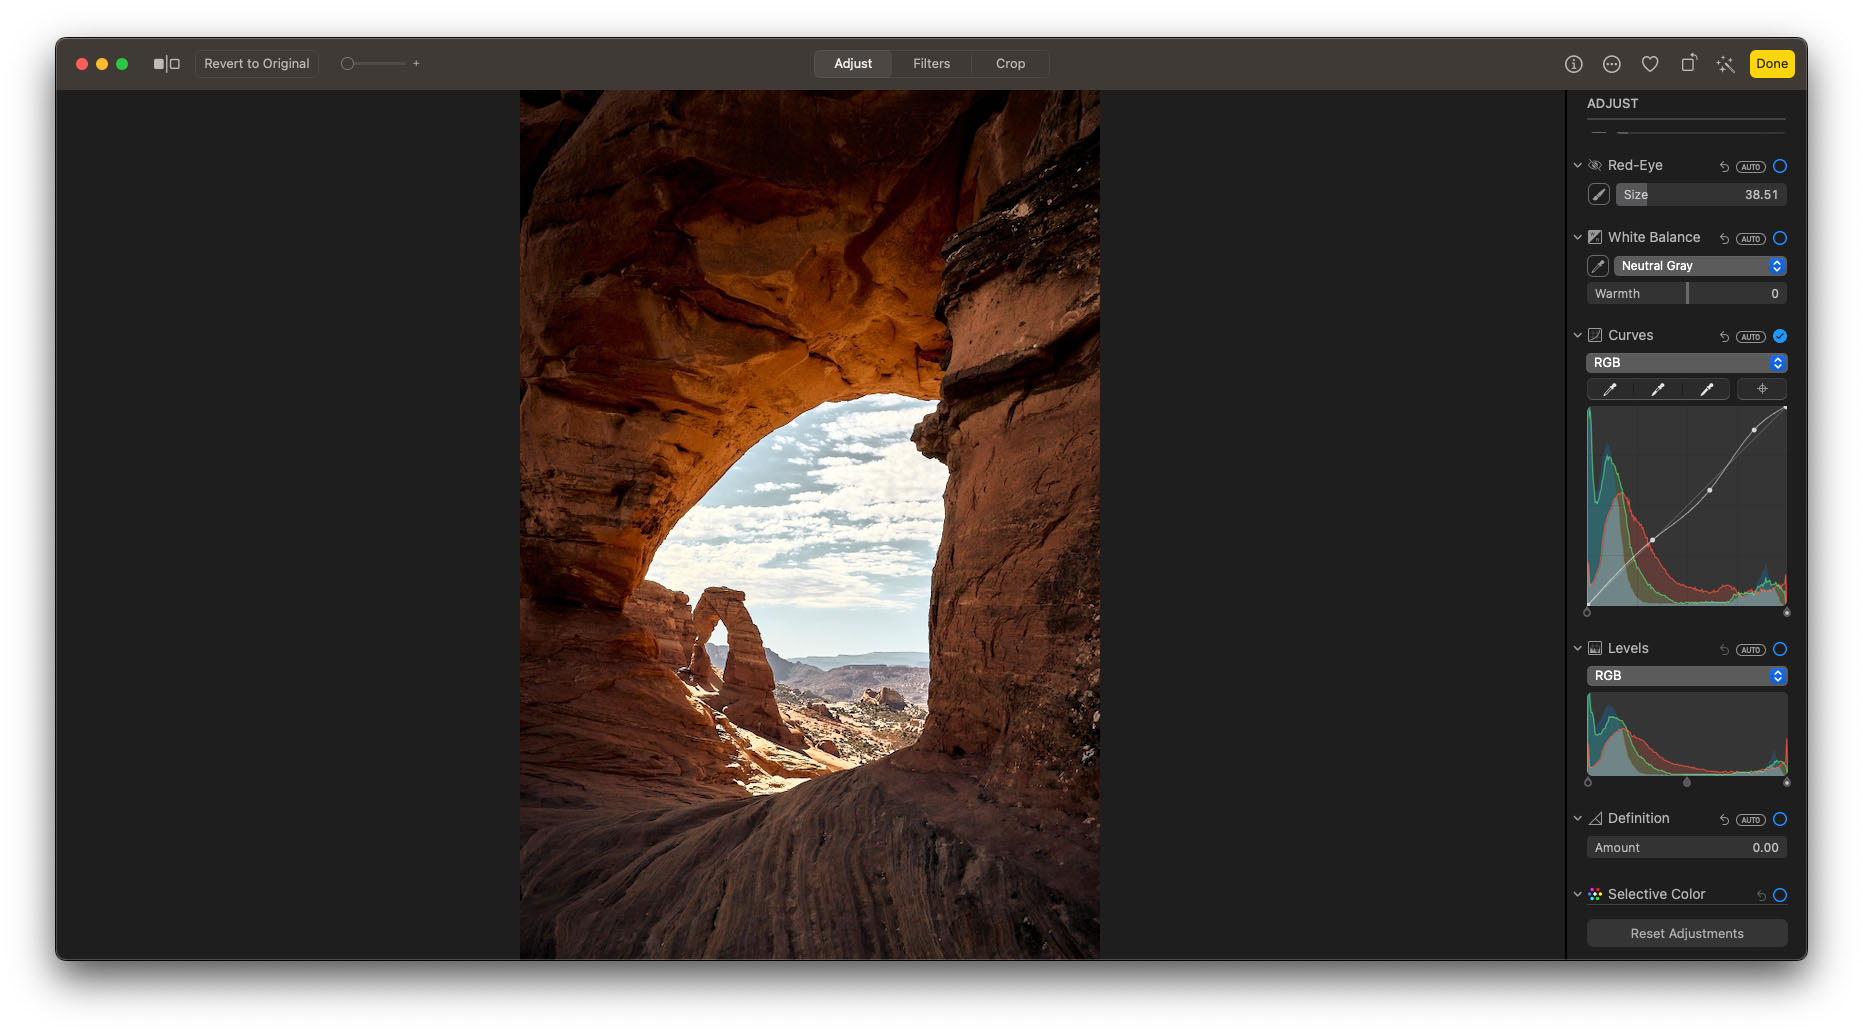
Curves
Easily change the brightness and contrast in your photo using the Curves adjustment. You’ll see a histogram with a diagonal line going from the bottom-left corner (the black point) to the upper-right corner (the white point). Add points along the line at specific places where you want to change the photo. Dragging a point up increases the brightness, and dragging it down decreases the brightness. Moving the point to the left increases contrast, and moving it to the right decreases contrast. You can also manually set the black point, midtones, or white point of the histogram with the Eyedropper buttons.
Levels
Lighten or darken specific areas of your photo and fine-tune contrast with the Levels adjustment. Manually adjust the levels by dragging the handles of the histogram, or change the color cast of a specific color in the photo by selecting from the drop-down menu.
Definition
This adjustment allows you to add contour and shape, along with midtone definition and local contrast. Simply move the slider to the right until you are happy with the result.
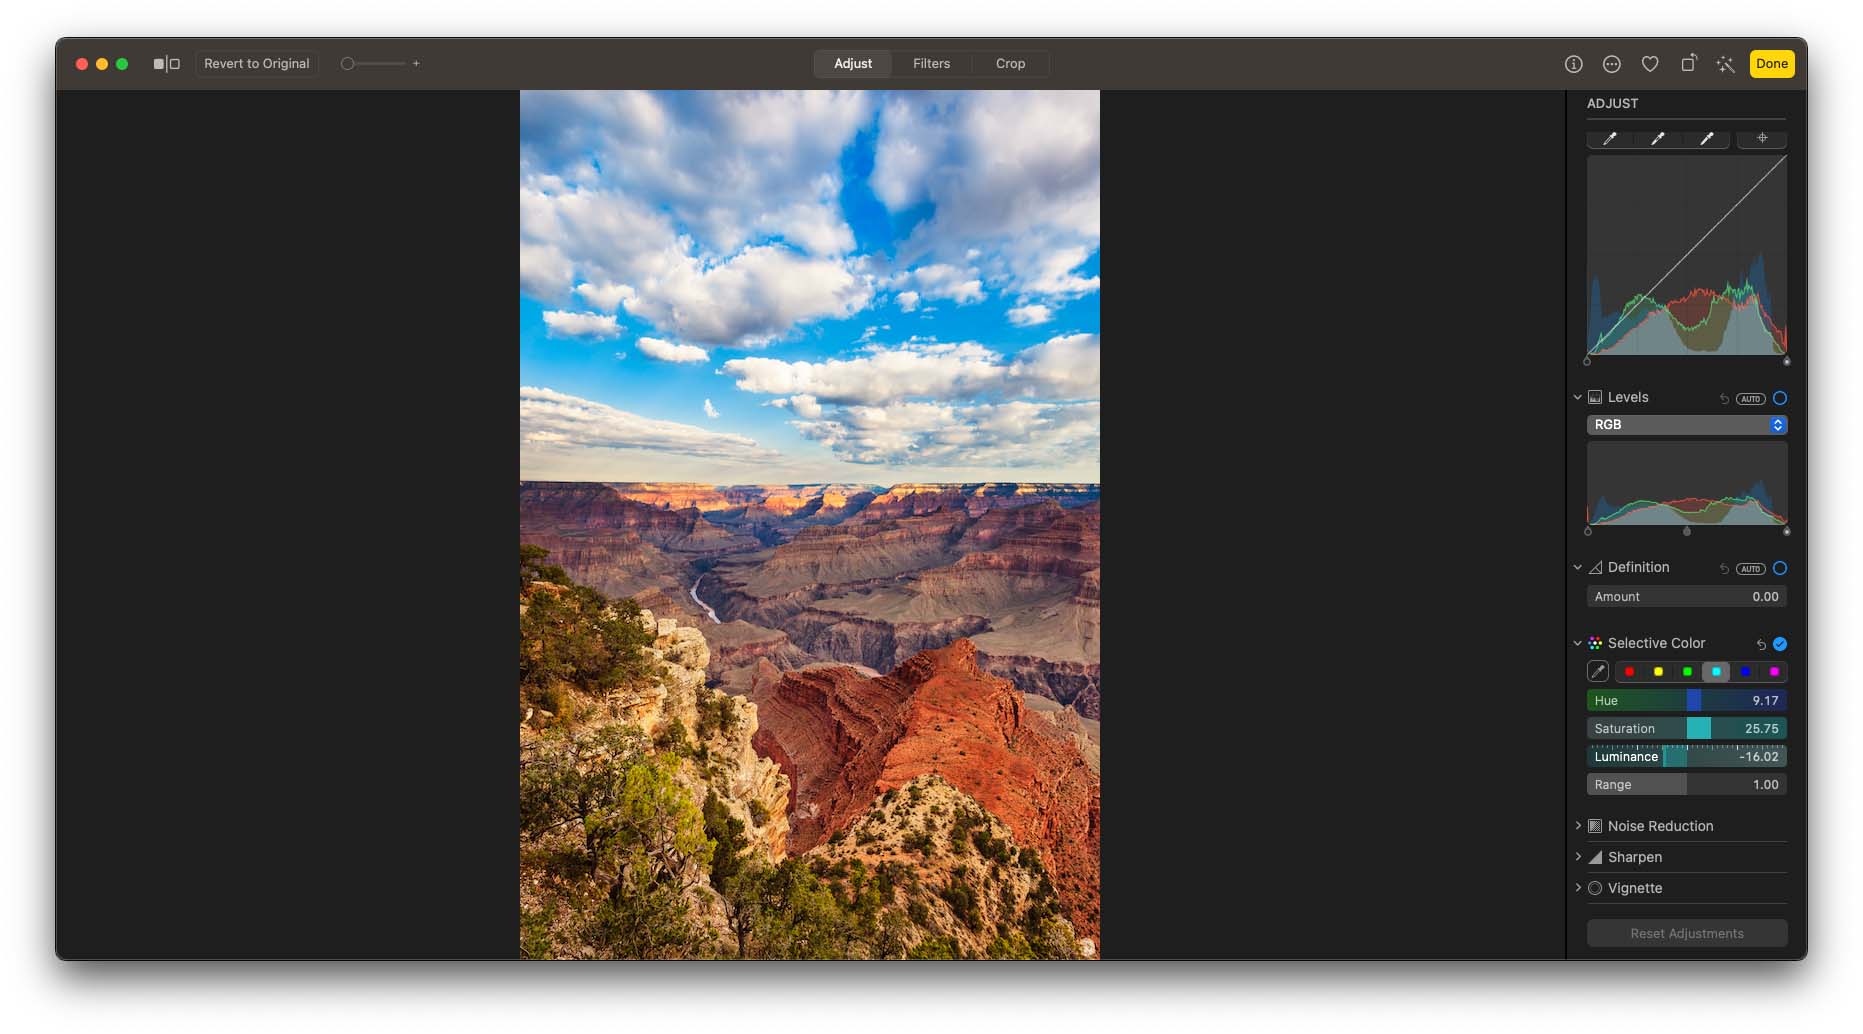
Selective Color
Need to recolor one element of your photo? Use the Selective Color adjustment to selectively make changes to a single color. You can change the color’s hue, saturation, and luminance. To store the color change, click one of the colors from the color well then use the Eyedropper tool to select the color in your photo that you want to modify. When that color is selected, you can drag the sliders to change the color.
Noise Reduction & Sharpen
If your photo was taken in low light and appears grainy, use the Noise Reduction adjustment to reduce or eliminate the graininess. To make the edges of your photo more crisp and better refined, choose the Sharpen adjustment. For each, simply move the slider to the right until you are happy with the result.

Vignette
Darken the edges of a photo to put emphasis on the center of the image with the Vignette adjustment. Alter the strength (how dark or light the vignette appears), radius (the vignette’s size), and softness (opacity of the vignette) using the sliders.
Copy and Pasting Your New Edits
In the world of photo editing, efficiency is key. Luckily, with the Photos app on macOS, you can easily copy edits from one photo and paste them onto others, streamlining your editing process. Here's how:
Once you've perfected the edits:
- Head to the "Image" menu at the top of the screen.
- From the dropdown menu, select "Copy Adjustments" or use the keyboard shortcut Command + C.
Now apply those edits to another photo:
- Navigate to the photo you want to edit.
- Click on the photo to select it.
- Return to the "Image" menu.
- From the dropdown menu, select "Paste Adjustments" or use the keyboard shortcut Command + V.
By following these steps, you can seamlessly transfer the same edits from one photo to another, saving you time and ensuring consistency across your images. Keep in mind that while most edits will transfer smoothly, some adjustments may vary depending on the content of the photos. Nonetheless, this feature offers a convenient way to apply similar enhancements across multiple images, enhancing your workflow and productivity.

Try Out Our Film Look
While the Photos app on macOS may not have a dedicated grain tool, you can still achieve a classic film look using some adjustments. Follow these steps to give your images that nostalgic film vibe:
- White Balance: Set the White Balance to Neutral Gray with the Warmth set to +12.
- Luminance Levels: Play with the Luminance Levels to bring out the shadows and decrease the highlights, creating a more dynamic range in your image.
- Selective Color: Click on the red square and lower the hue to -4 and the saturation to 9.5. Then, select the yellow square and increase the saturation to 13.2 while decreasing the luminance to -8.3. This adjustment helps to emulate the color characteristics often found in film photography.
- Light: Move the Light slider to the right so that it is 90% of the way to being completely on the right side. This adjustment adds warmth and depth to your image, mimicking the soft, diffused lighting often seen in film photography.
By applying these editing adjustments, you can achieve a film look in your photos, even without a dedicated grain tool. Experiment with these settings to find the perfect balance and bring a touch of cinematic nostalgia to your images.
Start Editing!
The best part about making edits to your photos directly within the Mimeo Photos for Mac app is that they’ll immediately be applied to your project without having to leave the app. From basic adjustments to pro-level enhancements, you now have all the tools you need to transform your photography into works of art. Whether you’re creating personalized photo books or unique photo gifts, mastering these editing techniques will take your images to a whole new level.
Ready to turn your photos into stunning keepsakes? Download the Mimeo Photos for Mac app today and bring your cherished moments to life.