Nov 19th 2019
With the latest Mimeo Photos update, we are excited to announce we now offer Prints! Create Prints in multiple sizes and finishes.
Read on to learn more about our new product.
Update Now
Getting Started with Prints
To create a print, select the photos or the entire album that you would like to include in your project.
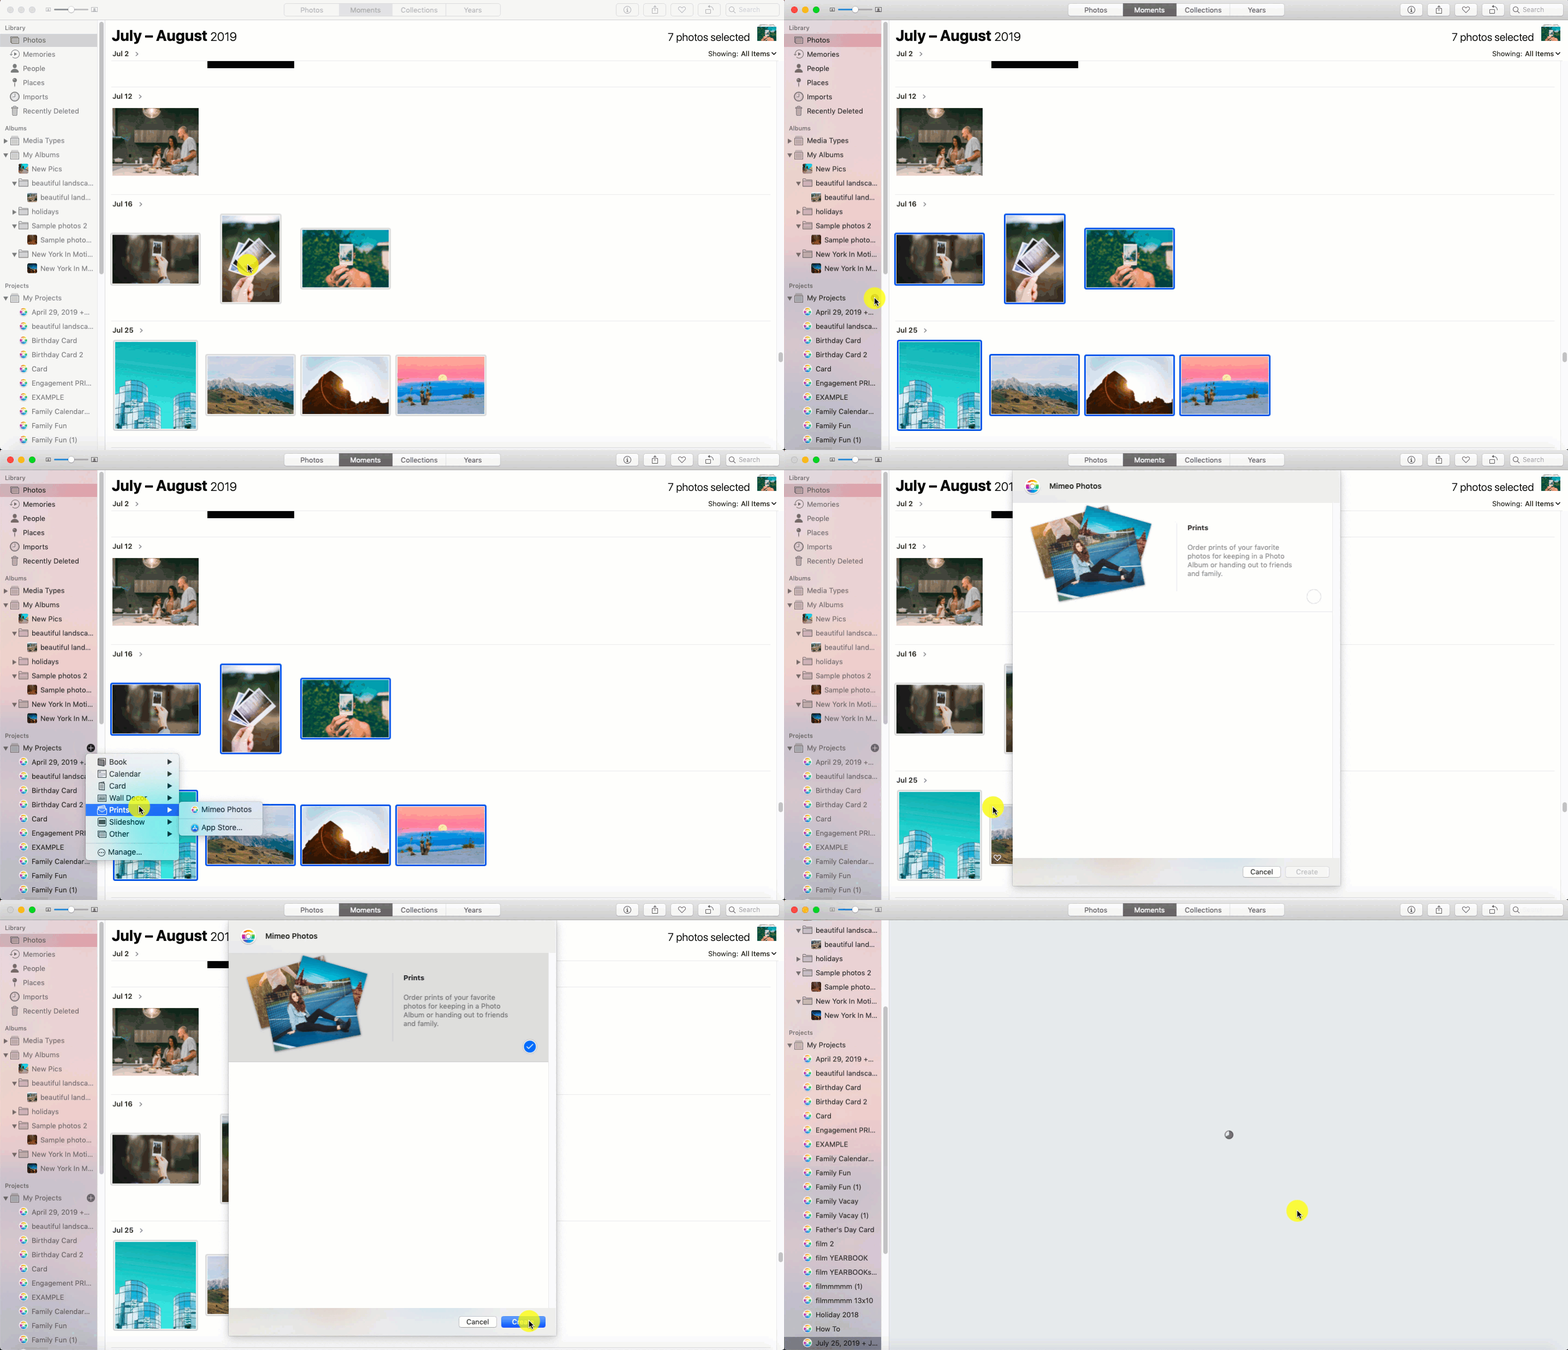
1. Click the (+) next to My Projects
2. Select Prints > Mimeo Photos
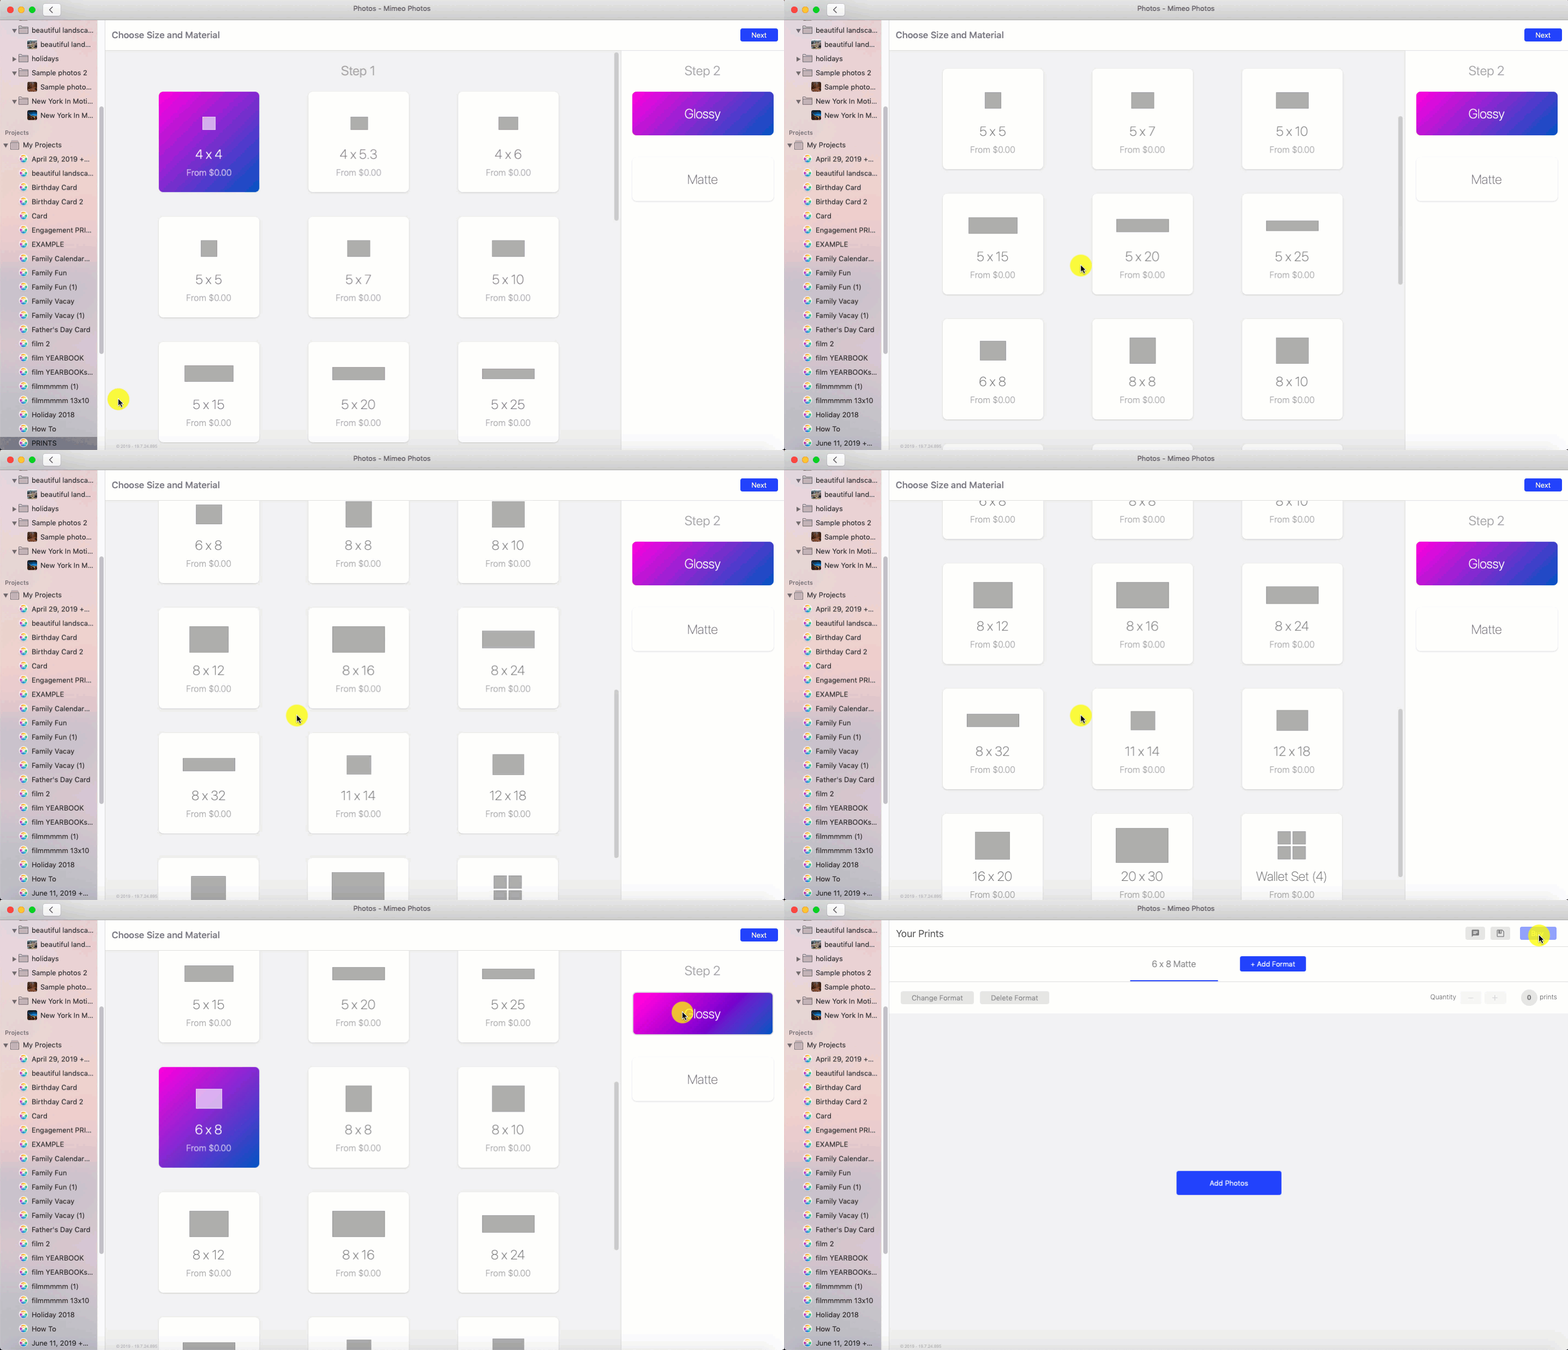
3. Choose a Size
4. Choose the Material (matte/glossy)
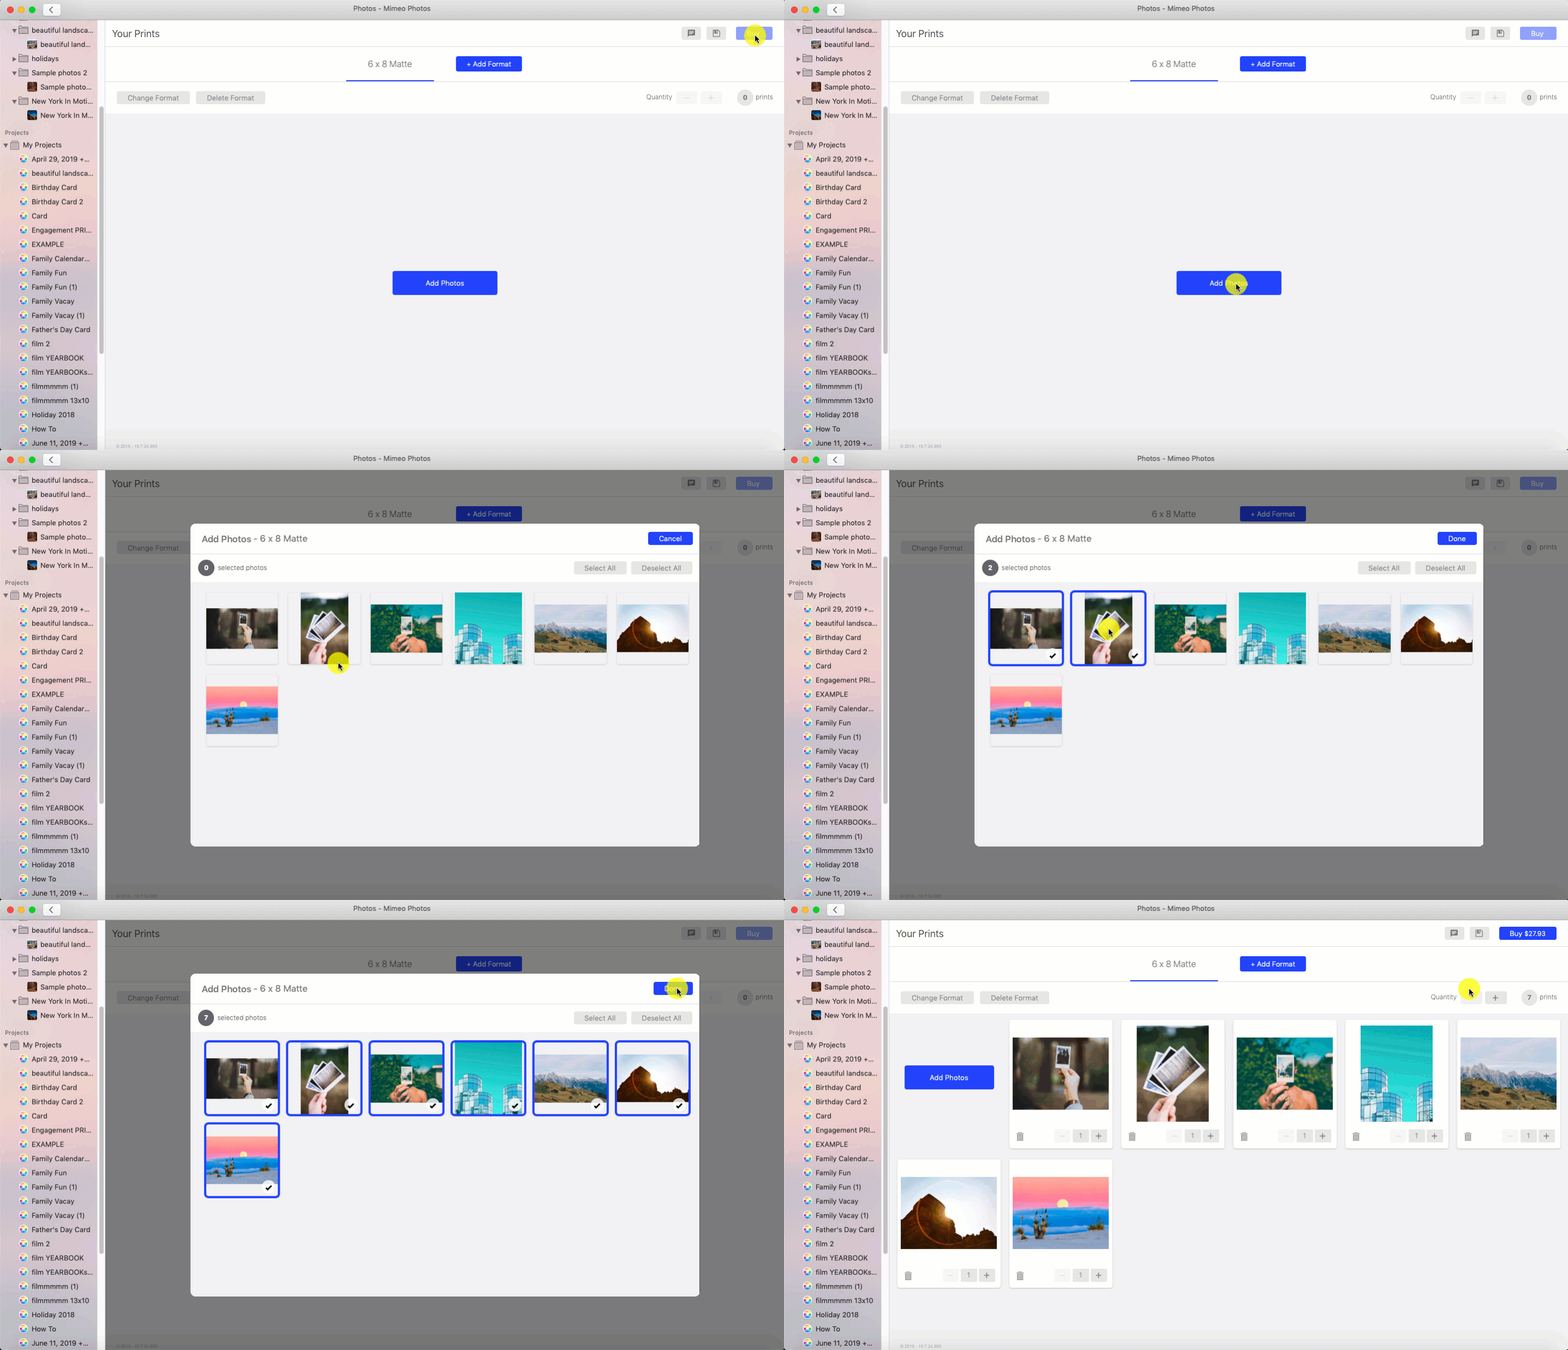
5. Click Add Photos
6. Select the photos you want for that format
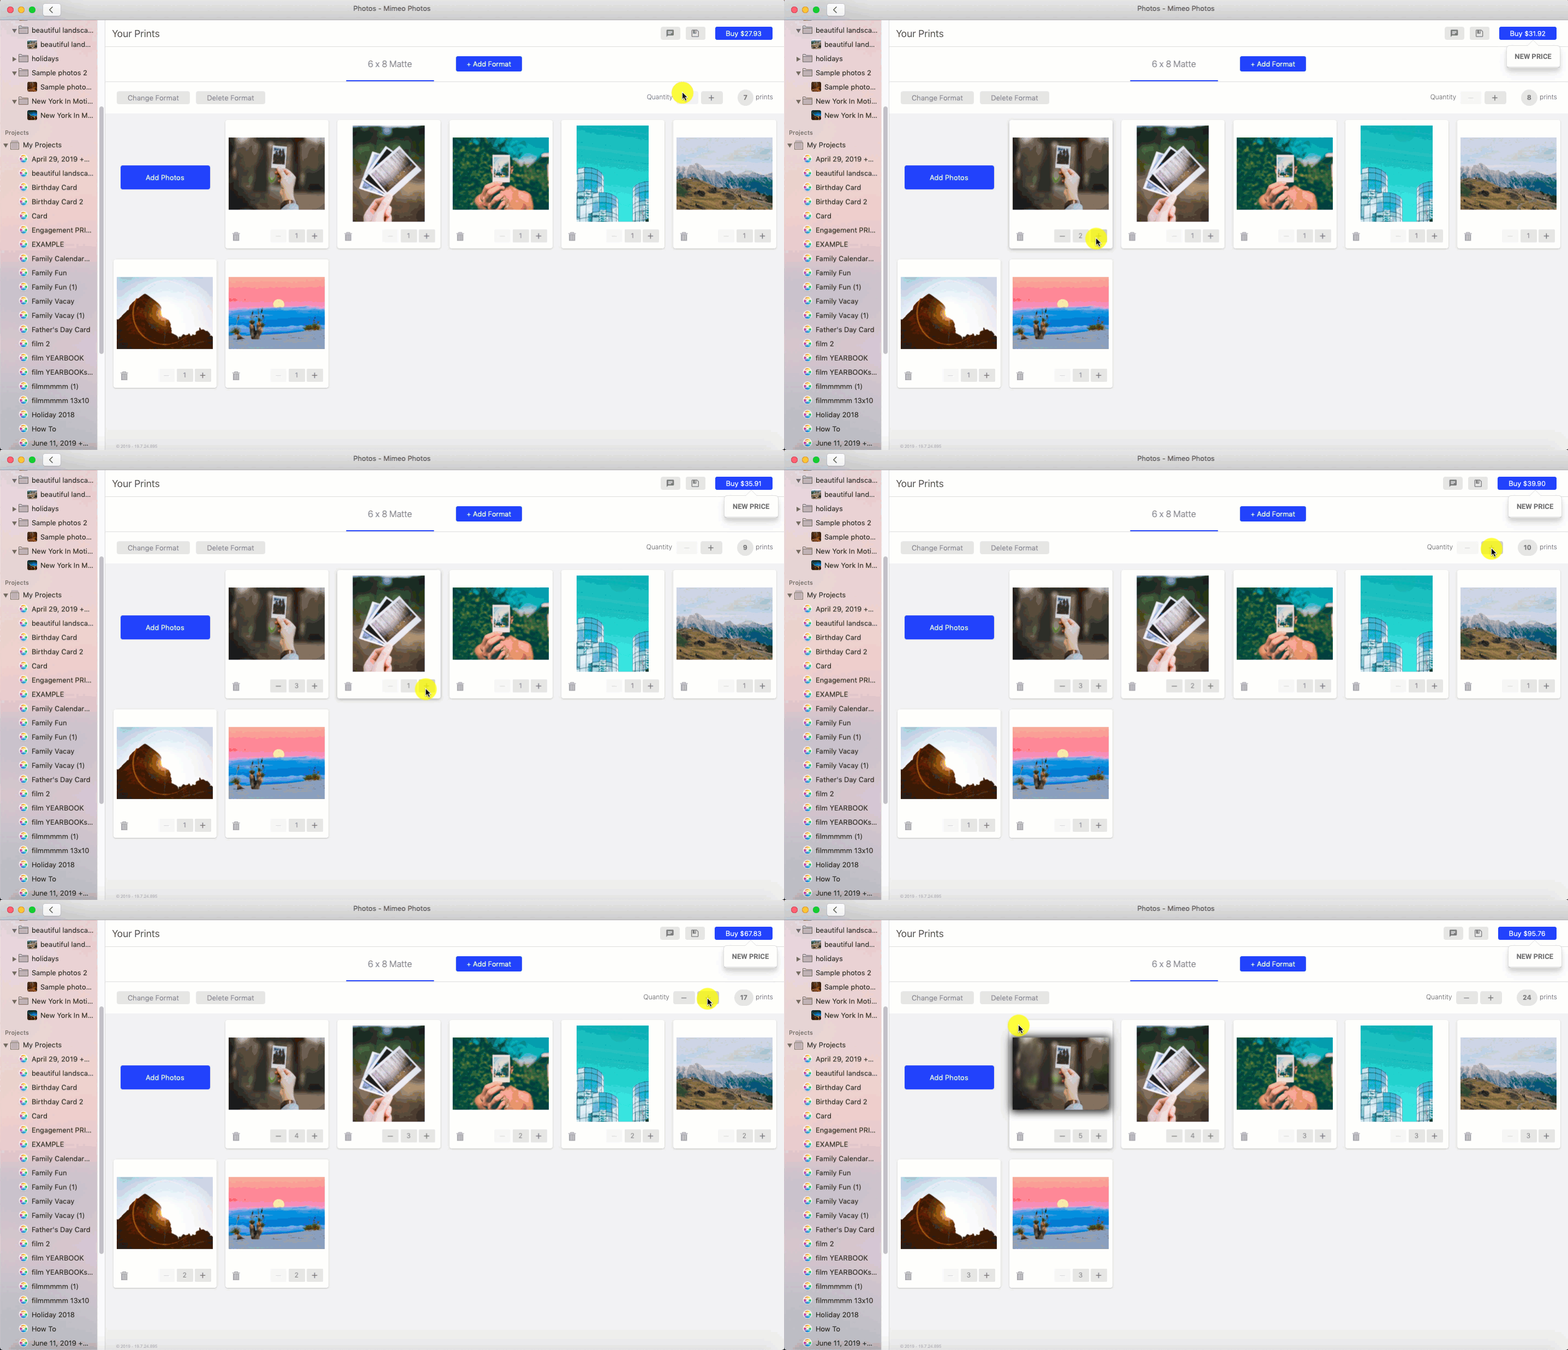
Adjust the number of prints you want for a singular photo by clicking the (-,+) under the image. Alternatively, update the quantity of all your prints by clicking the (-,+) on the top right.
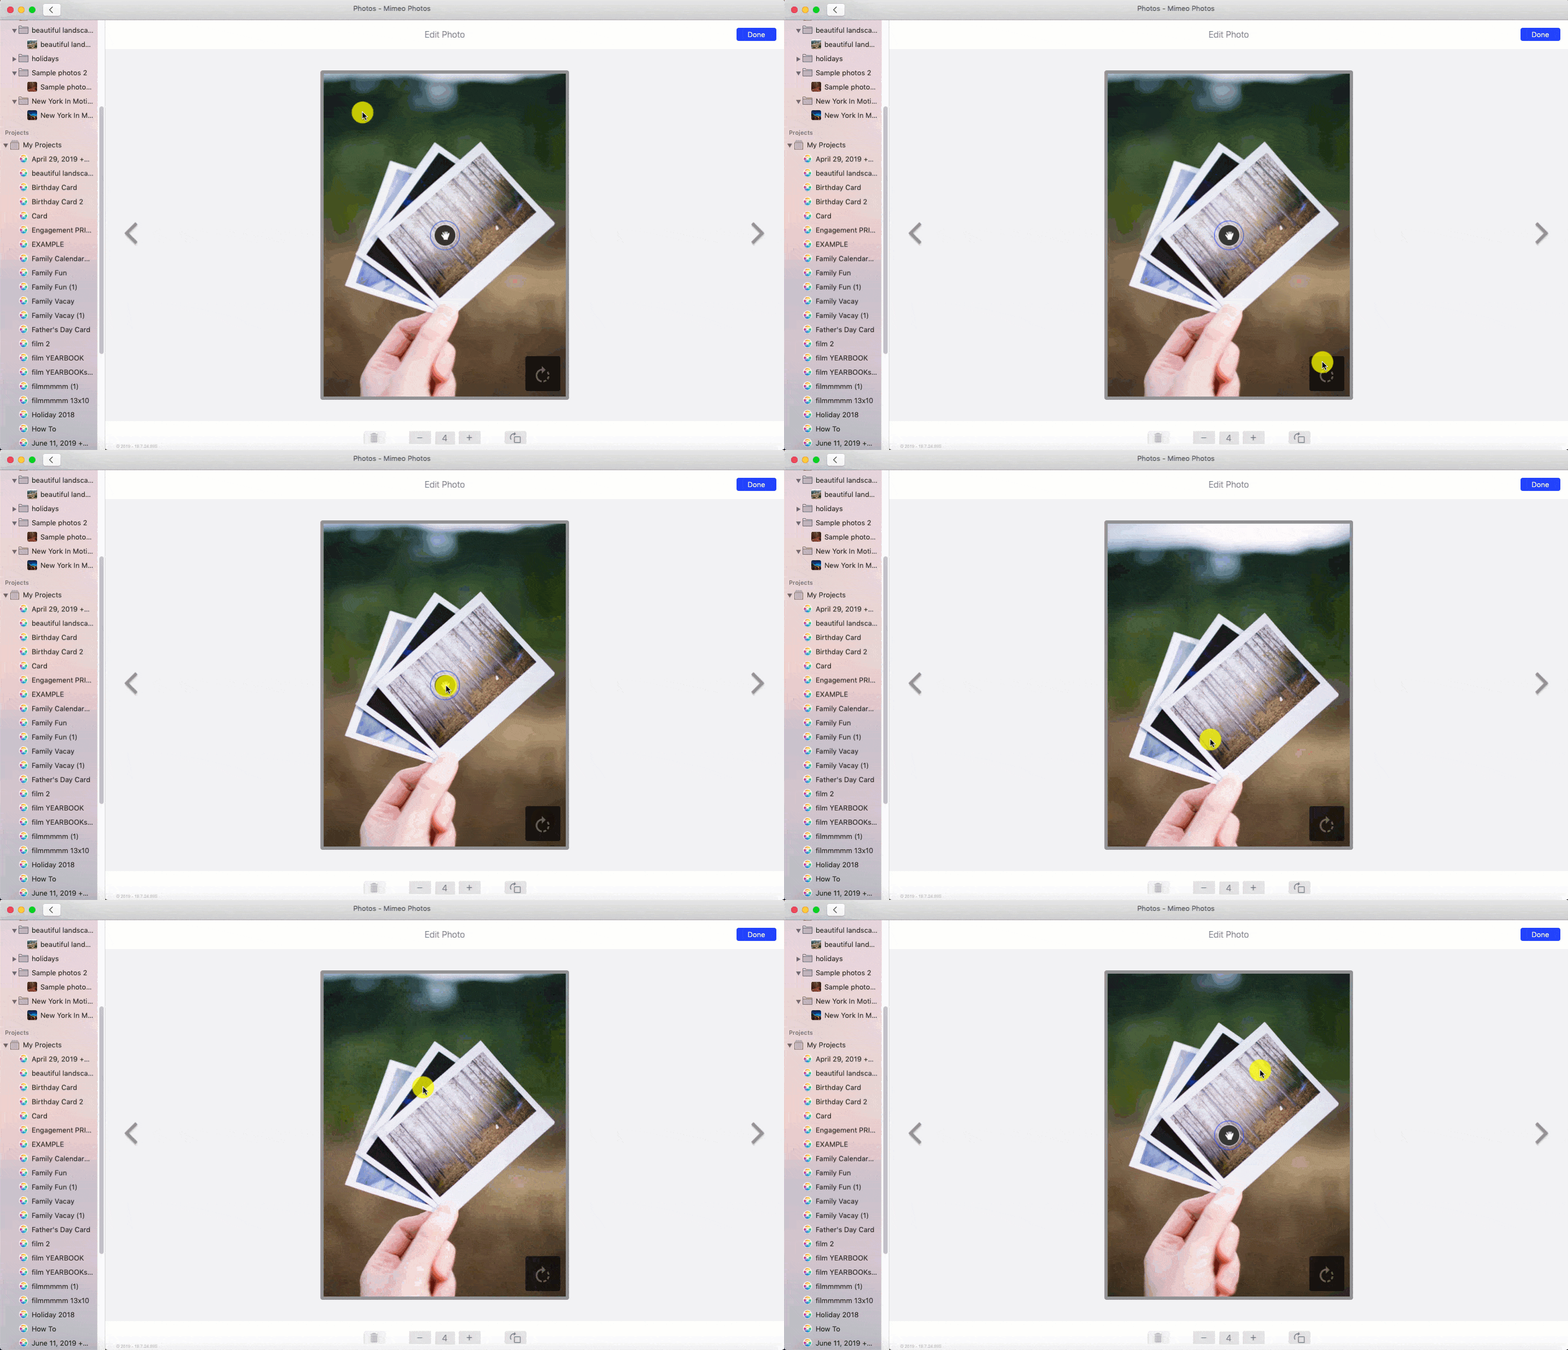
To adjust a print, click the photo and use the hand icon for moving the image in the crop box. Flip the orientation of the picture using the button on the bottom right-hand corner.
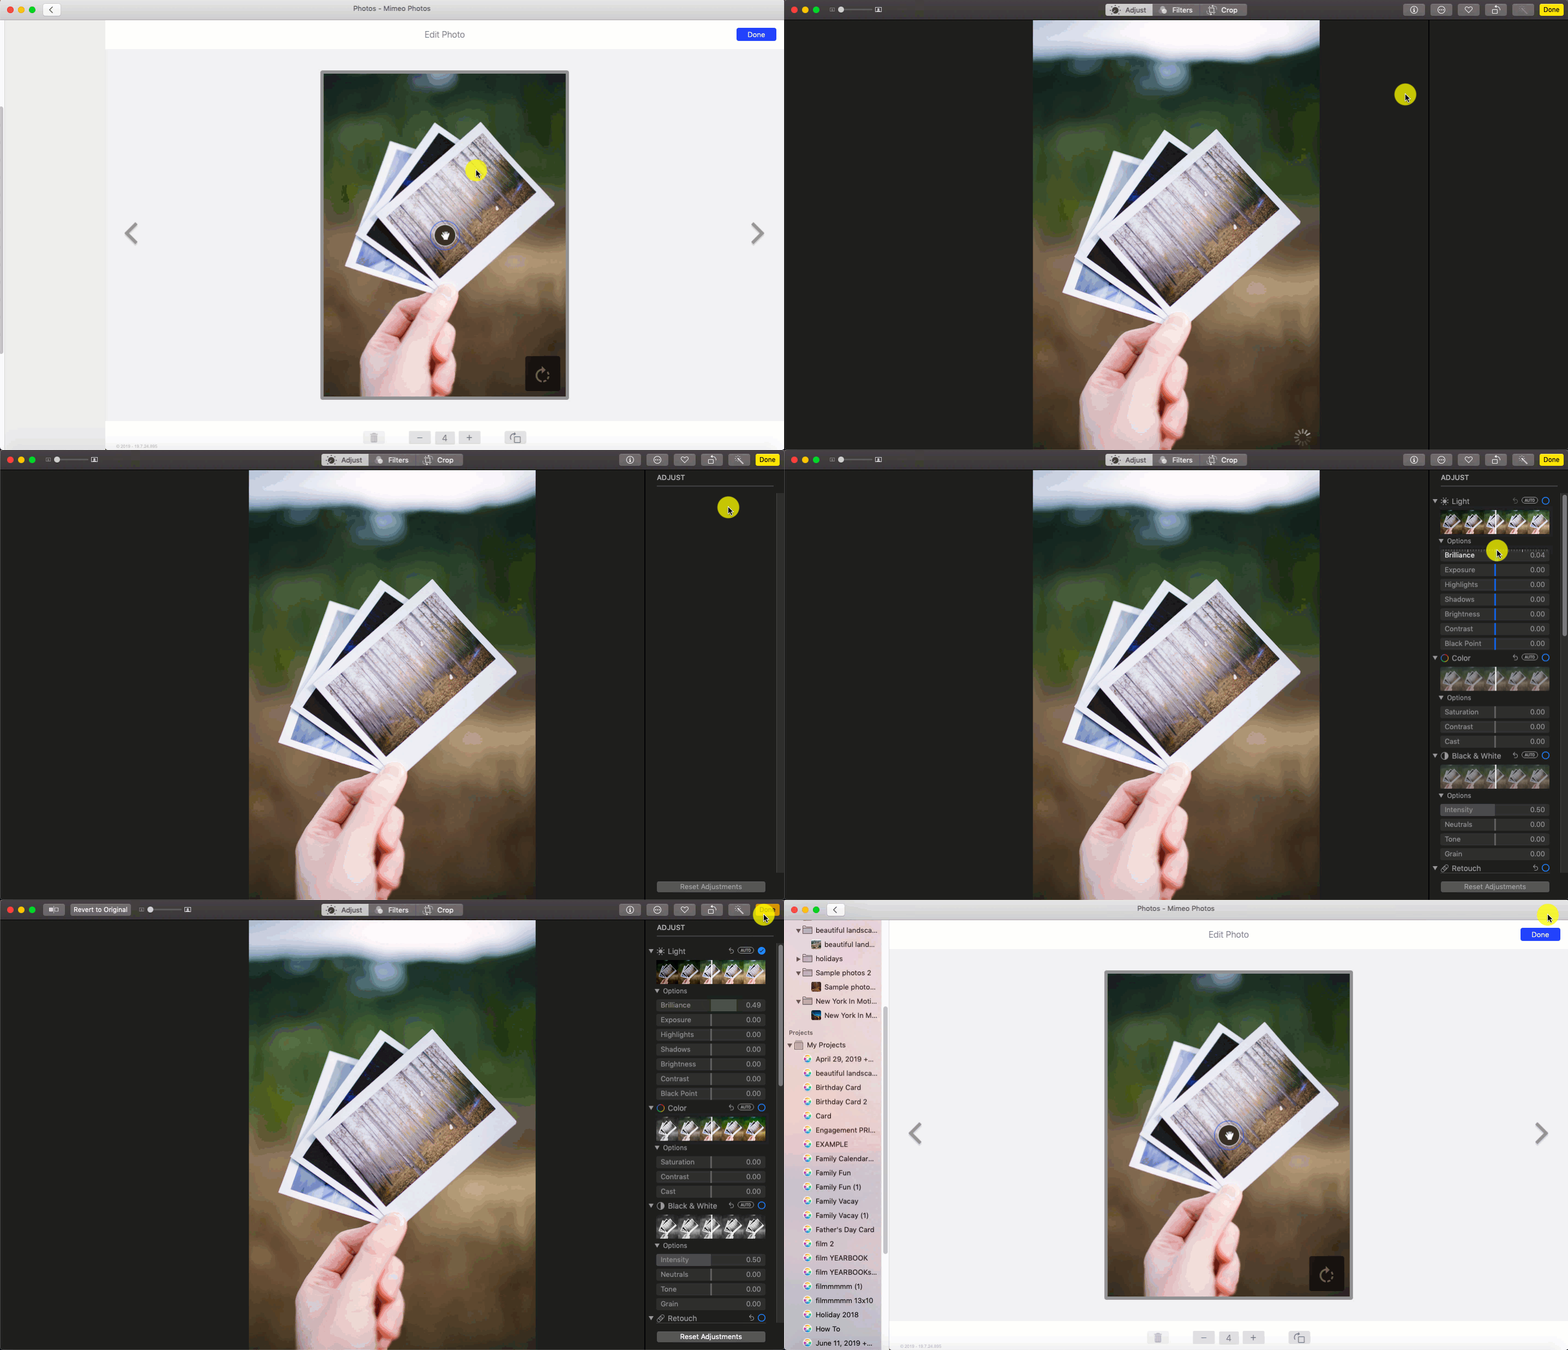
Need to enhance your picture? To further edit an image, double-click the photo while still in the Edit Photo window. Here, you can fine-tune your picture by manipulating the look and feel of your image. Use the round trip editing tool to:
- Adjust the light, color, and sharpness
- Apply filters
- Crop, straighten or flip your photos
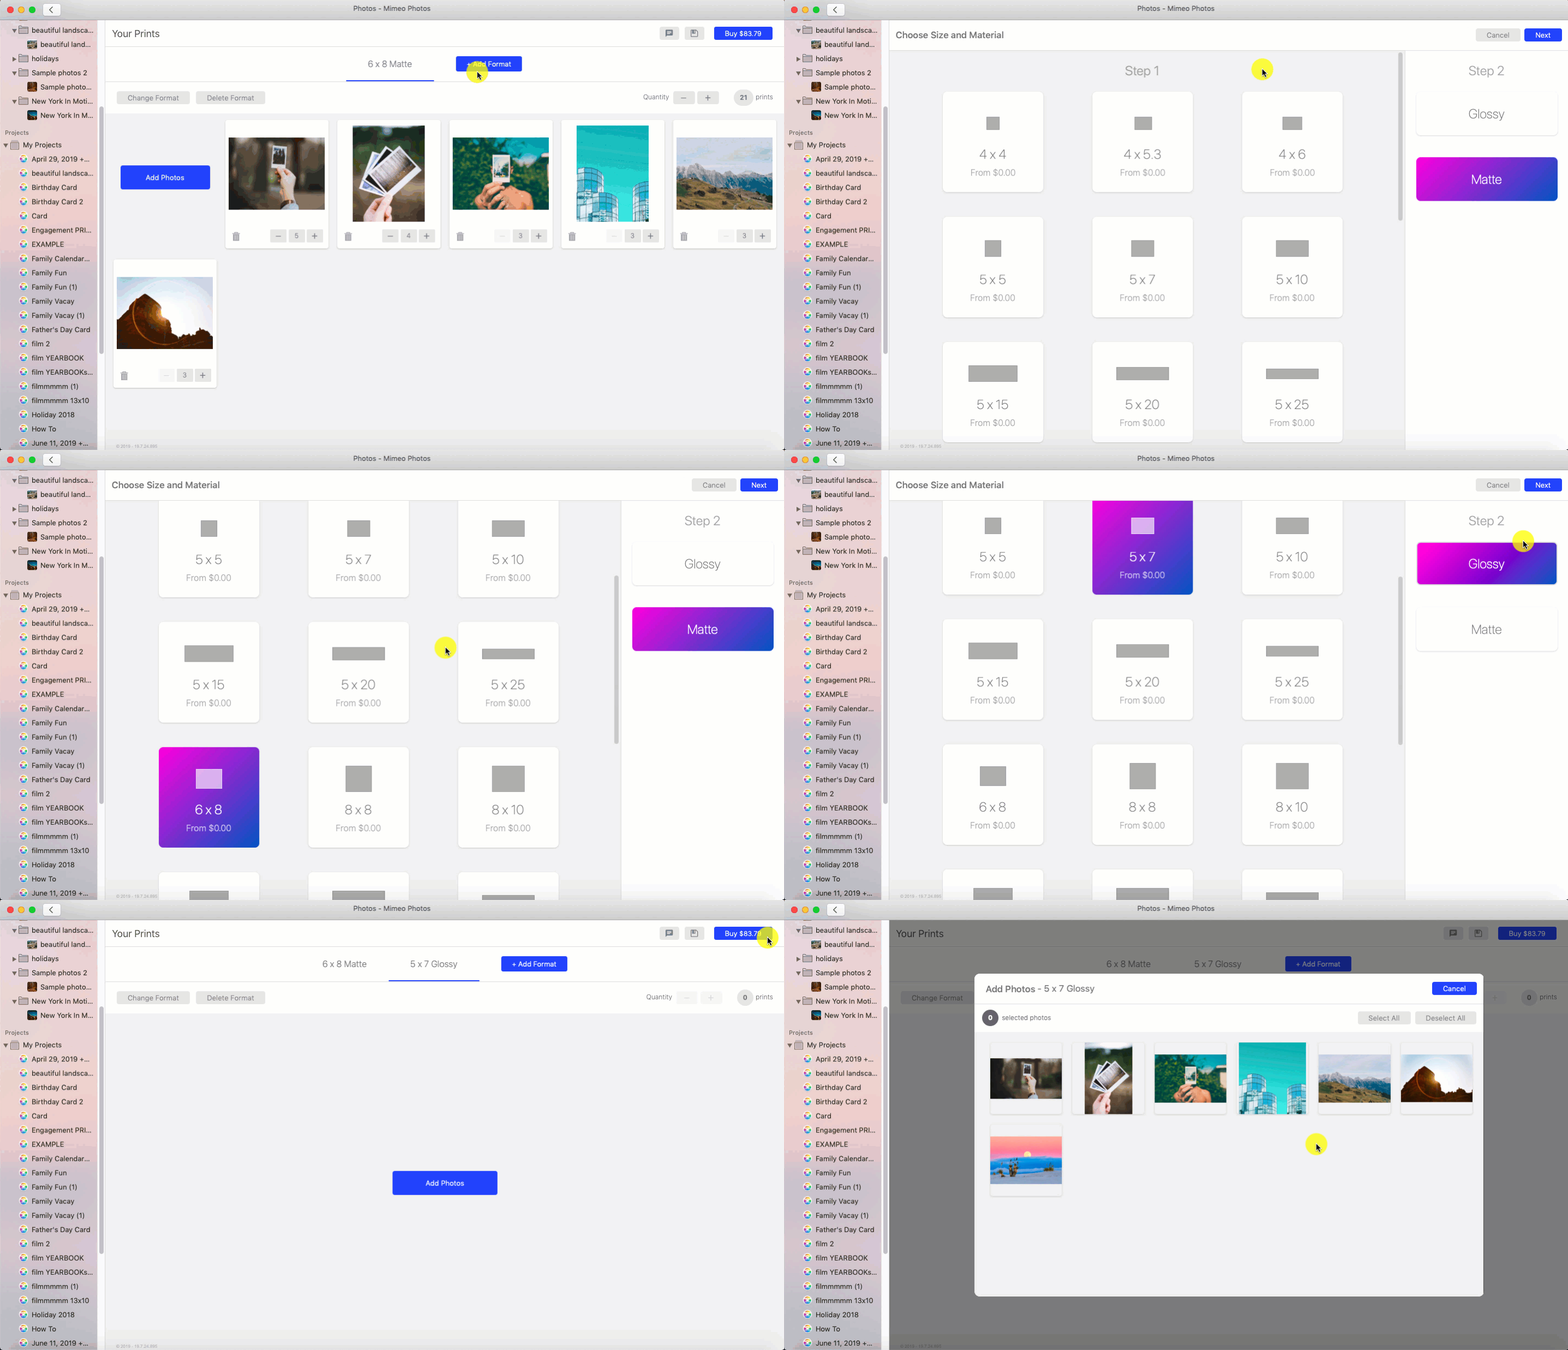
If you want to change the format and finish of your prints:
- Select Change Format
- And choose through a variety of different sizes.
Want to Bundle Your Print Order?
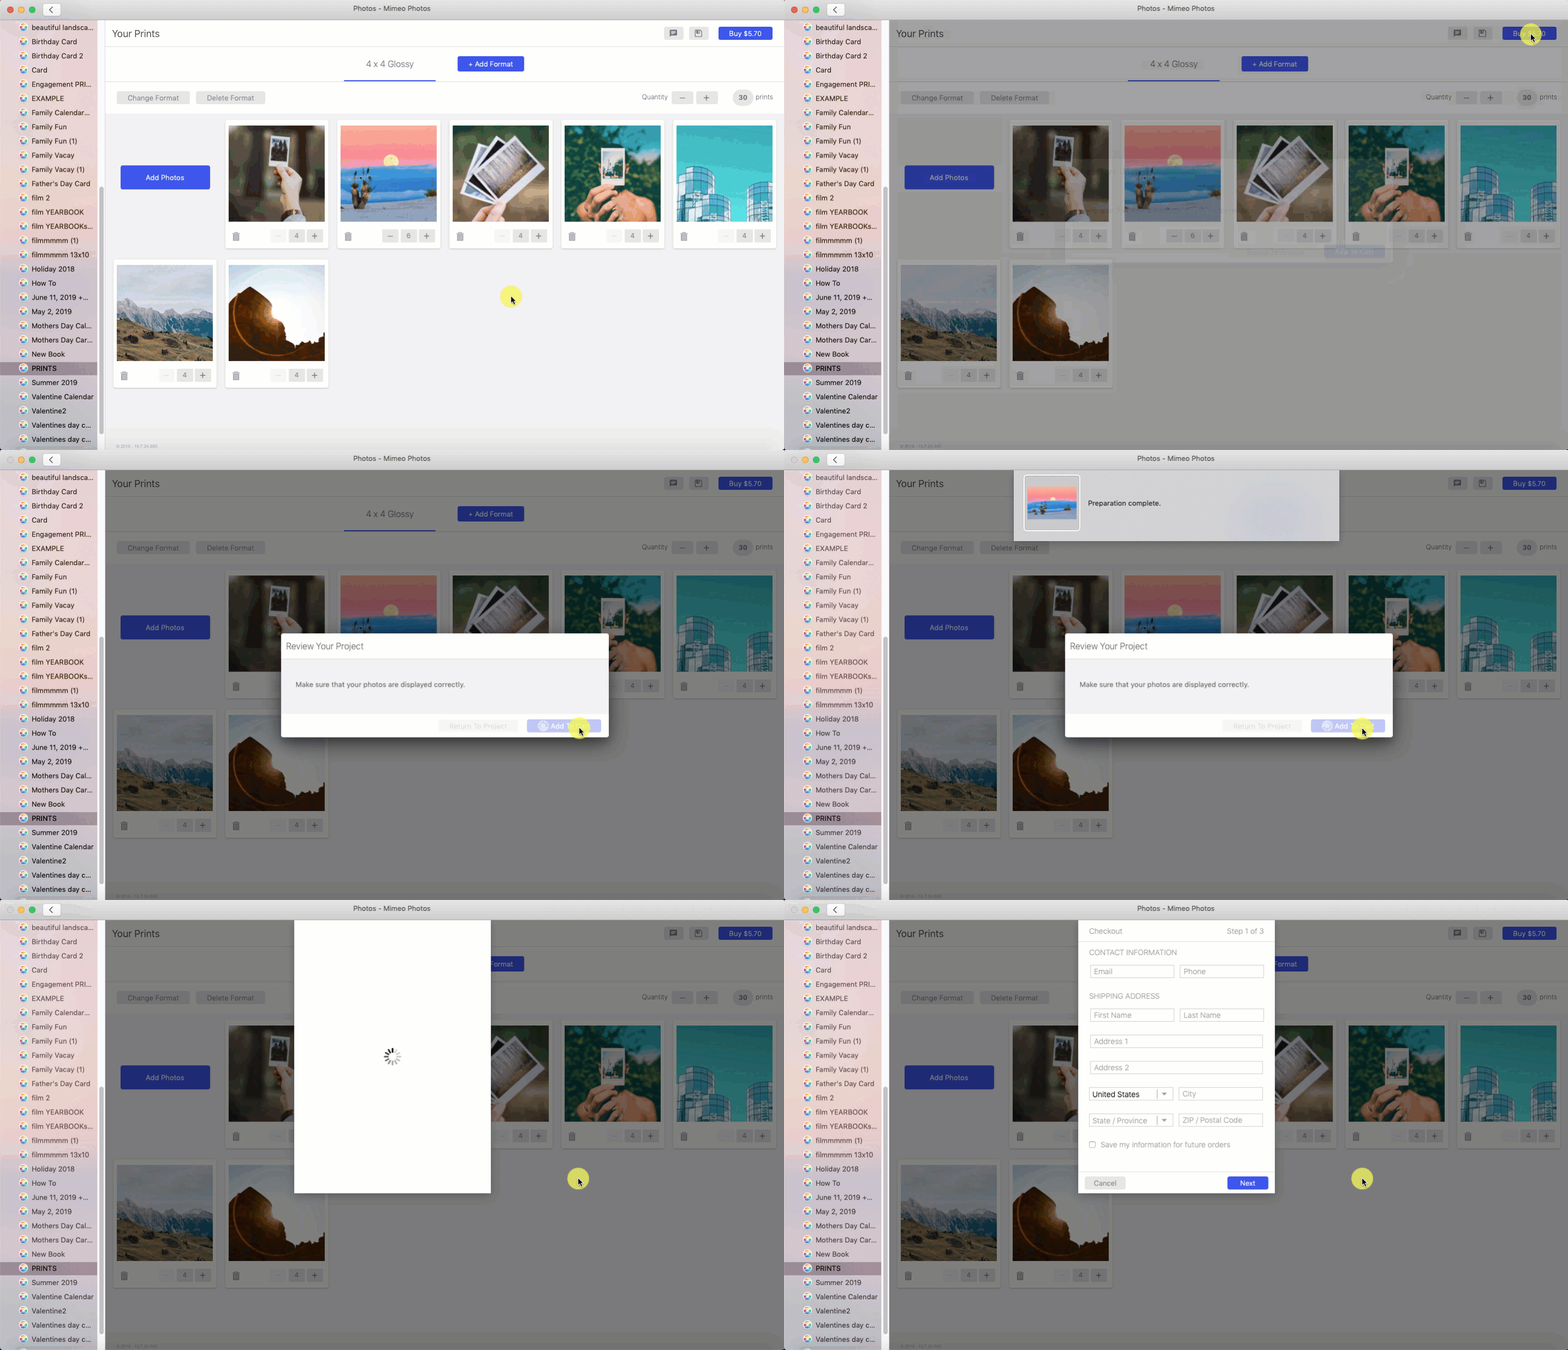
Add more than one format to an order by clicking the blue button + Add Format.
Once you have carefully crafted your photos and completed your project, click the Buy button in the top right corner of the designer. Review and confirm images and select Add to Cart. Choose where you’d like your prints to go by adding shipping information, payment details and click Place Order. Your prints will then be uploaded and a confirmation email will be sent.
Update to Mimeo Photos 4.0 to experience our latest product, features and app updates!


