Sep 4th 2019
Today, most anyone can take a great photo thanks to the powerful iPhone camera lenses and editing tools. However, while these can be as simple as point-and-shoot, if you want to get professional-level results, you’ll have to familiarize yourself with some of the device’s basic and more intricate features.
Follow this step-by-step guide to get the most out of your iPhone’s camera.
Understanding iPhone Lens Specs
Each year, Apple releases a new model of the iPhone. And, with each new iteration of the phone comes stronger camera capabilities. Just check out the lens specs of the latest models:
- iPhone 5S and iPhone 6: Both of these models feature an 8-megapixel camera with a 1/3-inch sensor.
- iPhone 7: The iPhone 7 features a six-element lens with a 12-megapixel camera. It also has built-in Optical Image Stabilization (OIS) plus 2x optical zoom.
- iPhone 8: On paper, the iPhone 8 camera is identical to the iPhone 7. Except Apple states that the addition of the A11 Bionic means major improvements. Specifically, the “Apple-designed Image Signal Processor (ISP) … promises to bring better pixel processing, faster low-light autofocus and noise reduction.”
- iPhone X: Known for having one of the most powerful smartphone cameras around, the iPhone X features powerful technology to back the hardware. The X boasts a True Depth camera system — bundling together two cameras, sensors for light and proximity, a dot projector, and a flood illuminator.
Regardless of which model you have, you can get incredible results by paying attention to a few technical details before you shoot.
How to Take Great Photos Using an iPhone
You can take photos using the built-in camera without the need for any additional apps or add-ons (like detachable lenses). Here’s how.
1. Choose Your Shooting Mode
Every iPhone comes with multiple shooting modes. Here’s a breakdown with some recommendations about when to use each of them.
- Photo Mode: Use Photo Mode to capture rectangular shots.
- Square Mode: Switch to Square for square images.
- Pano Mode: This shooting mode is ideal for wide panoramic shots like landscapes.
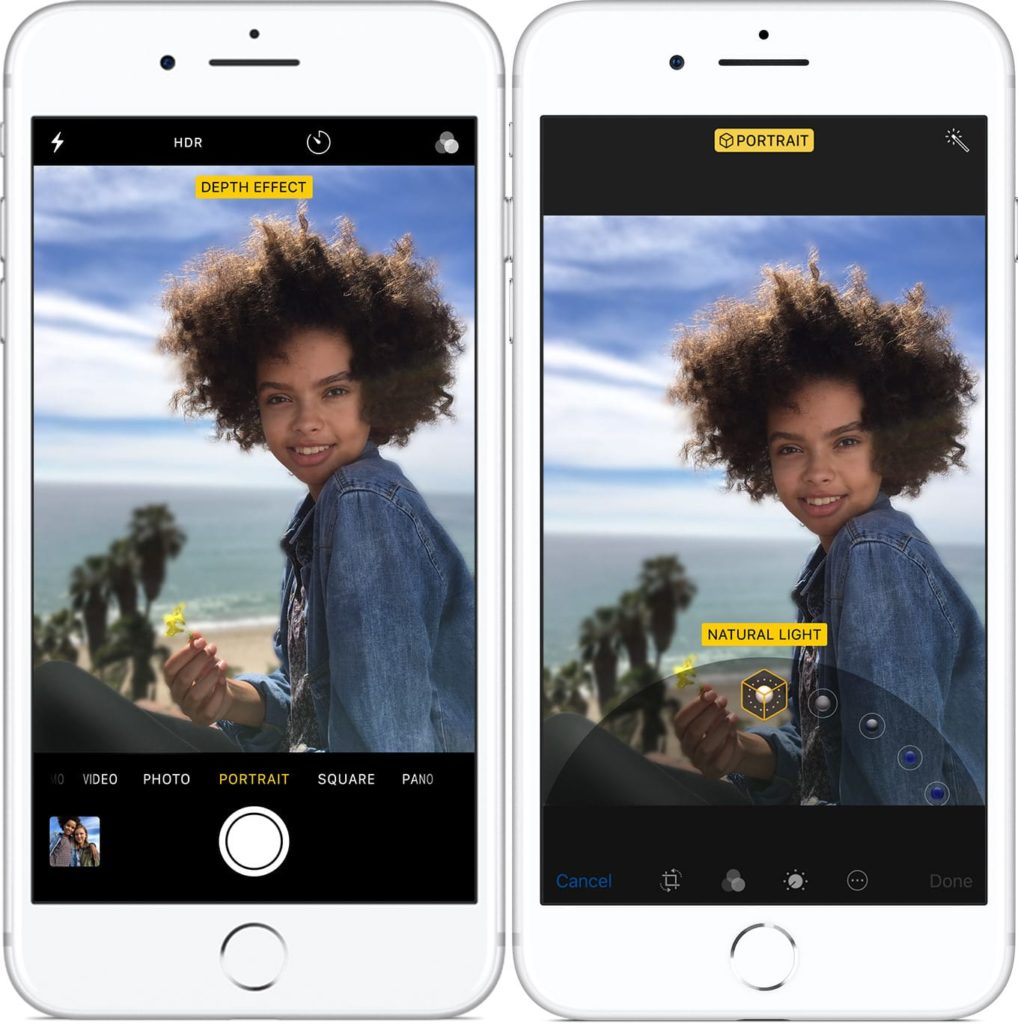
- Portrait Mode: Portrait Mode sharply focuses on the subject while smartly blurring the background — shoot in natural, studio, contour, stage, and stage mono lighting.
- HDR: HDR stands for “High Dynamic Range” and, when activated, the HDR setting processes photos differently to try and capture more detail from both dark areas and brighter areas. You may notice that it comes on automatically sometimes, but you can also turn it on manually. It’s ideal for capturing scenes with high contrast, like the blue sky above a mountaintop and the darker valley down below it.
- Burst: Burst mode allows you to capture many photos at once by holding down the button on your phone. This is ideal for taking action shots or photos of a moving subject. Burst mode captures many photos in quick succession, allowing you to look at them later and choose the best ones.
- Live shots: Live Photos are a type of iPhone photo that include a short snippet of movement before or after the photo was taken along with audio from that capture. Live Photos are kind of like GIFs, but with sound. Note that not every platform is compatible with Live Photos. Hold your finger over a Live Photo in your camera reel and slide up. You can then save the image to with a live, loop, bounce, or long exposure effect.
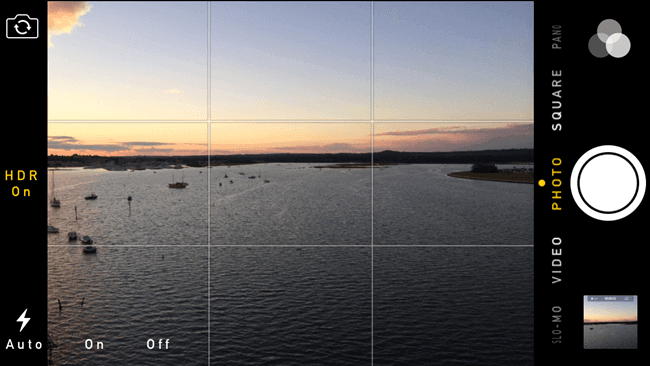
Using the Grid for Improved Composition
It helps to enable grid lines when deciding the orientation for your photo. Portrait versus landscape depends on your subject. Grid lines help your eye see your subject in the full layout of your photo. For instance, you may want the subject to be in the center of the frame or you may want to use the “Rule of Thirds” within the shot. To enable your iPhone’s camera grid:
- Enter iPhone Settings
- Select “Camera”
- Toggle “Grid” to on
2. Setting The Focus
Setting the camera focus on your iPhone is as simple as tapping on the screen over your subject. This allows the camera to auto-focus and it will also adjust the exposure as necessary. This method usually works great and is very quick to use.
After setting the focus, your iPhone works to make sure that the area you tapped on is in focus and properly exposed. Specifically that the subject is not too dark nor too bright.
In the case that you don’t set the focus, the camera phone will decide what it perceives should be in focus. This leads to potentially an image that is overexposed or underexposed.
3. Using The AE/AF Lock
The AE/AF lock stands for Auto Exposure/Auto Focus. By locking it, you are able to gain ultimate control over what your camera focuses on and what the exposure level is. To use the lock:
- Tap the screen to set the focus and exposure
- Press down on the area for a few seconds until the “AE/AF Lock” notification appears
- To remove the lock, simply tap another part of the screen
Now your camera will not automatically re-focus or re-expose before you take your next picture. As such, this feature is specifically beneficial if you are photographing a moving subject. Movement and changes in light cause the camera to re-focus or change the exposure on its own.
4. Adjusting Exposure
Adjusting the exposure on your iPhone’s camera is simple and requires only a few taps:
- Tap the screen where you’d like the camera to focus
- Lock the focus by holding the region with your fingertip for a brief second
- Now adjust the exposure by dragging your finger up and down over the “Sun” indidicator next to the yellow box
Now watch the screen as you increase or decrease the exposure, which causes the picture to get brighter or darker.
Photography Tip: Realize that overexposing or underexposing the photo can lead to “noise” or a fuzzy look.
5. Using Digital Zoom
There are two types of zoom a photographer can use: digital zoom and optical zoom.
- Optical zoom requires a special lens (like the ones you see attached to professional cameras) which acts as a magnifying glass to enable you to capture the incredible detail of something far away.
- Digital zoom, on the other hand, does little more than crop your frame of view so things look larger. That results in blurry photos and loss of details, so you should use digital zoom sparingly.
When taking photos with your iPhone using digital zoom, try to get as close to your subject as possible. Avoid using digital zoom and, instead, opt to crop your photos later as necessary. This will help you avoid blurry, pixelated results that are unusable.
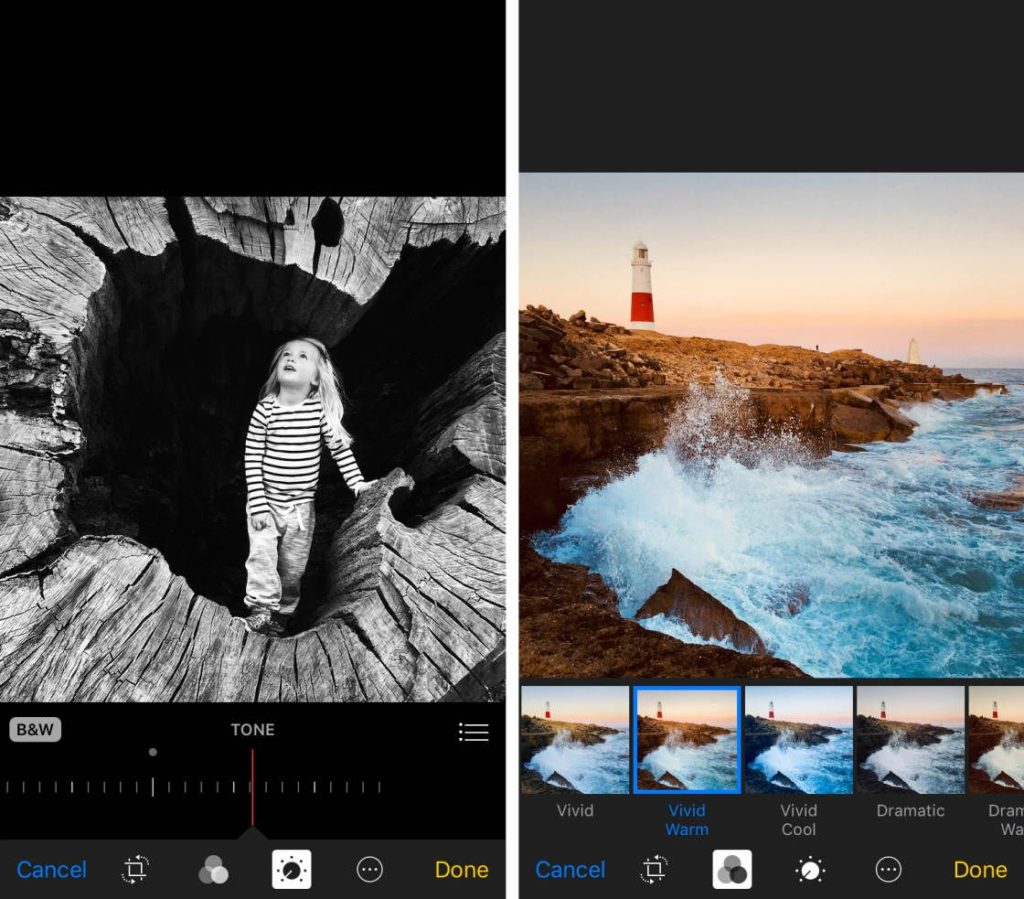
6. Editing Your Photos
When it comes to digital photography, a lot of the magic happens afterthe photo is taken. Using the phone’s editing tools or editing apps, you can take an “average” photo and make it awesome with simple adjustments including the image’s:
- Contrast
- Saturation
- Hue
- Highlights and shadows
- Filter
- Aspect ratio
Of course, the end result will always be directly connected to the photo’s initial quality. So, try to get the best photo without disturbing the moment.
Then make any tweaks that are necessary with editing after the fact. This will enable you to consistently get stunning photos. Once you get the hang of it, you might even decide to ditch filters for good.
Put Your Photos Into Permanence
Once you’ve mastered the art of iPhone photography share your collection. With Mimeo Photos, you can turn your favorite photos into beautiful keepsakes. Simply get started by airdropping images from your phone’s camera roll to your Mac.
From the Photos app you can build gleaming photo projects complete with Apple’s editing capabilities, text, backgrounds and more.
How you choose to tell your story is up to you — select from multiple photobook, card, and calendar options. Get started by learning more about how to use our free app for print photo projects.