Feb 22nd 2023
There are so many ways to add personality and unique touches to your photobooks, but one of our favorites is layering images. This technique works best when your background image includes a nature landscape or pattern, rather than people. By layering your photos, you can achieve a custom designed look without being a professional designer. We promise, it’s easy to do!

Step 1
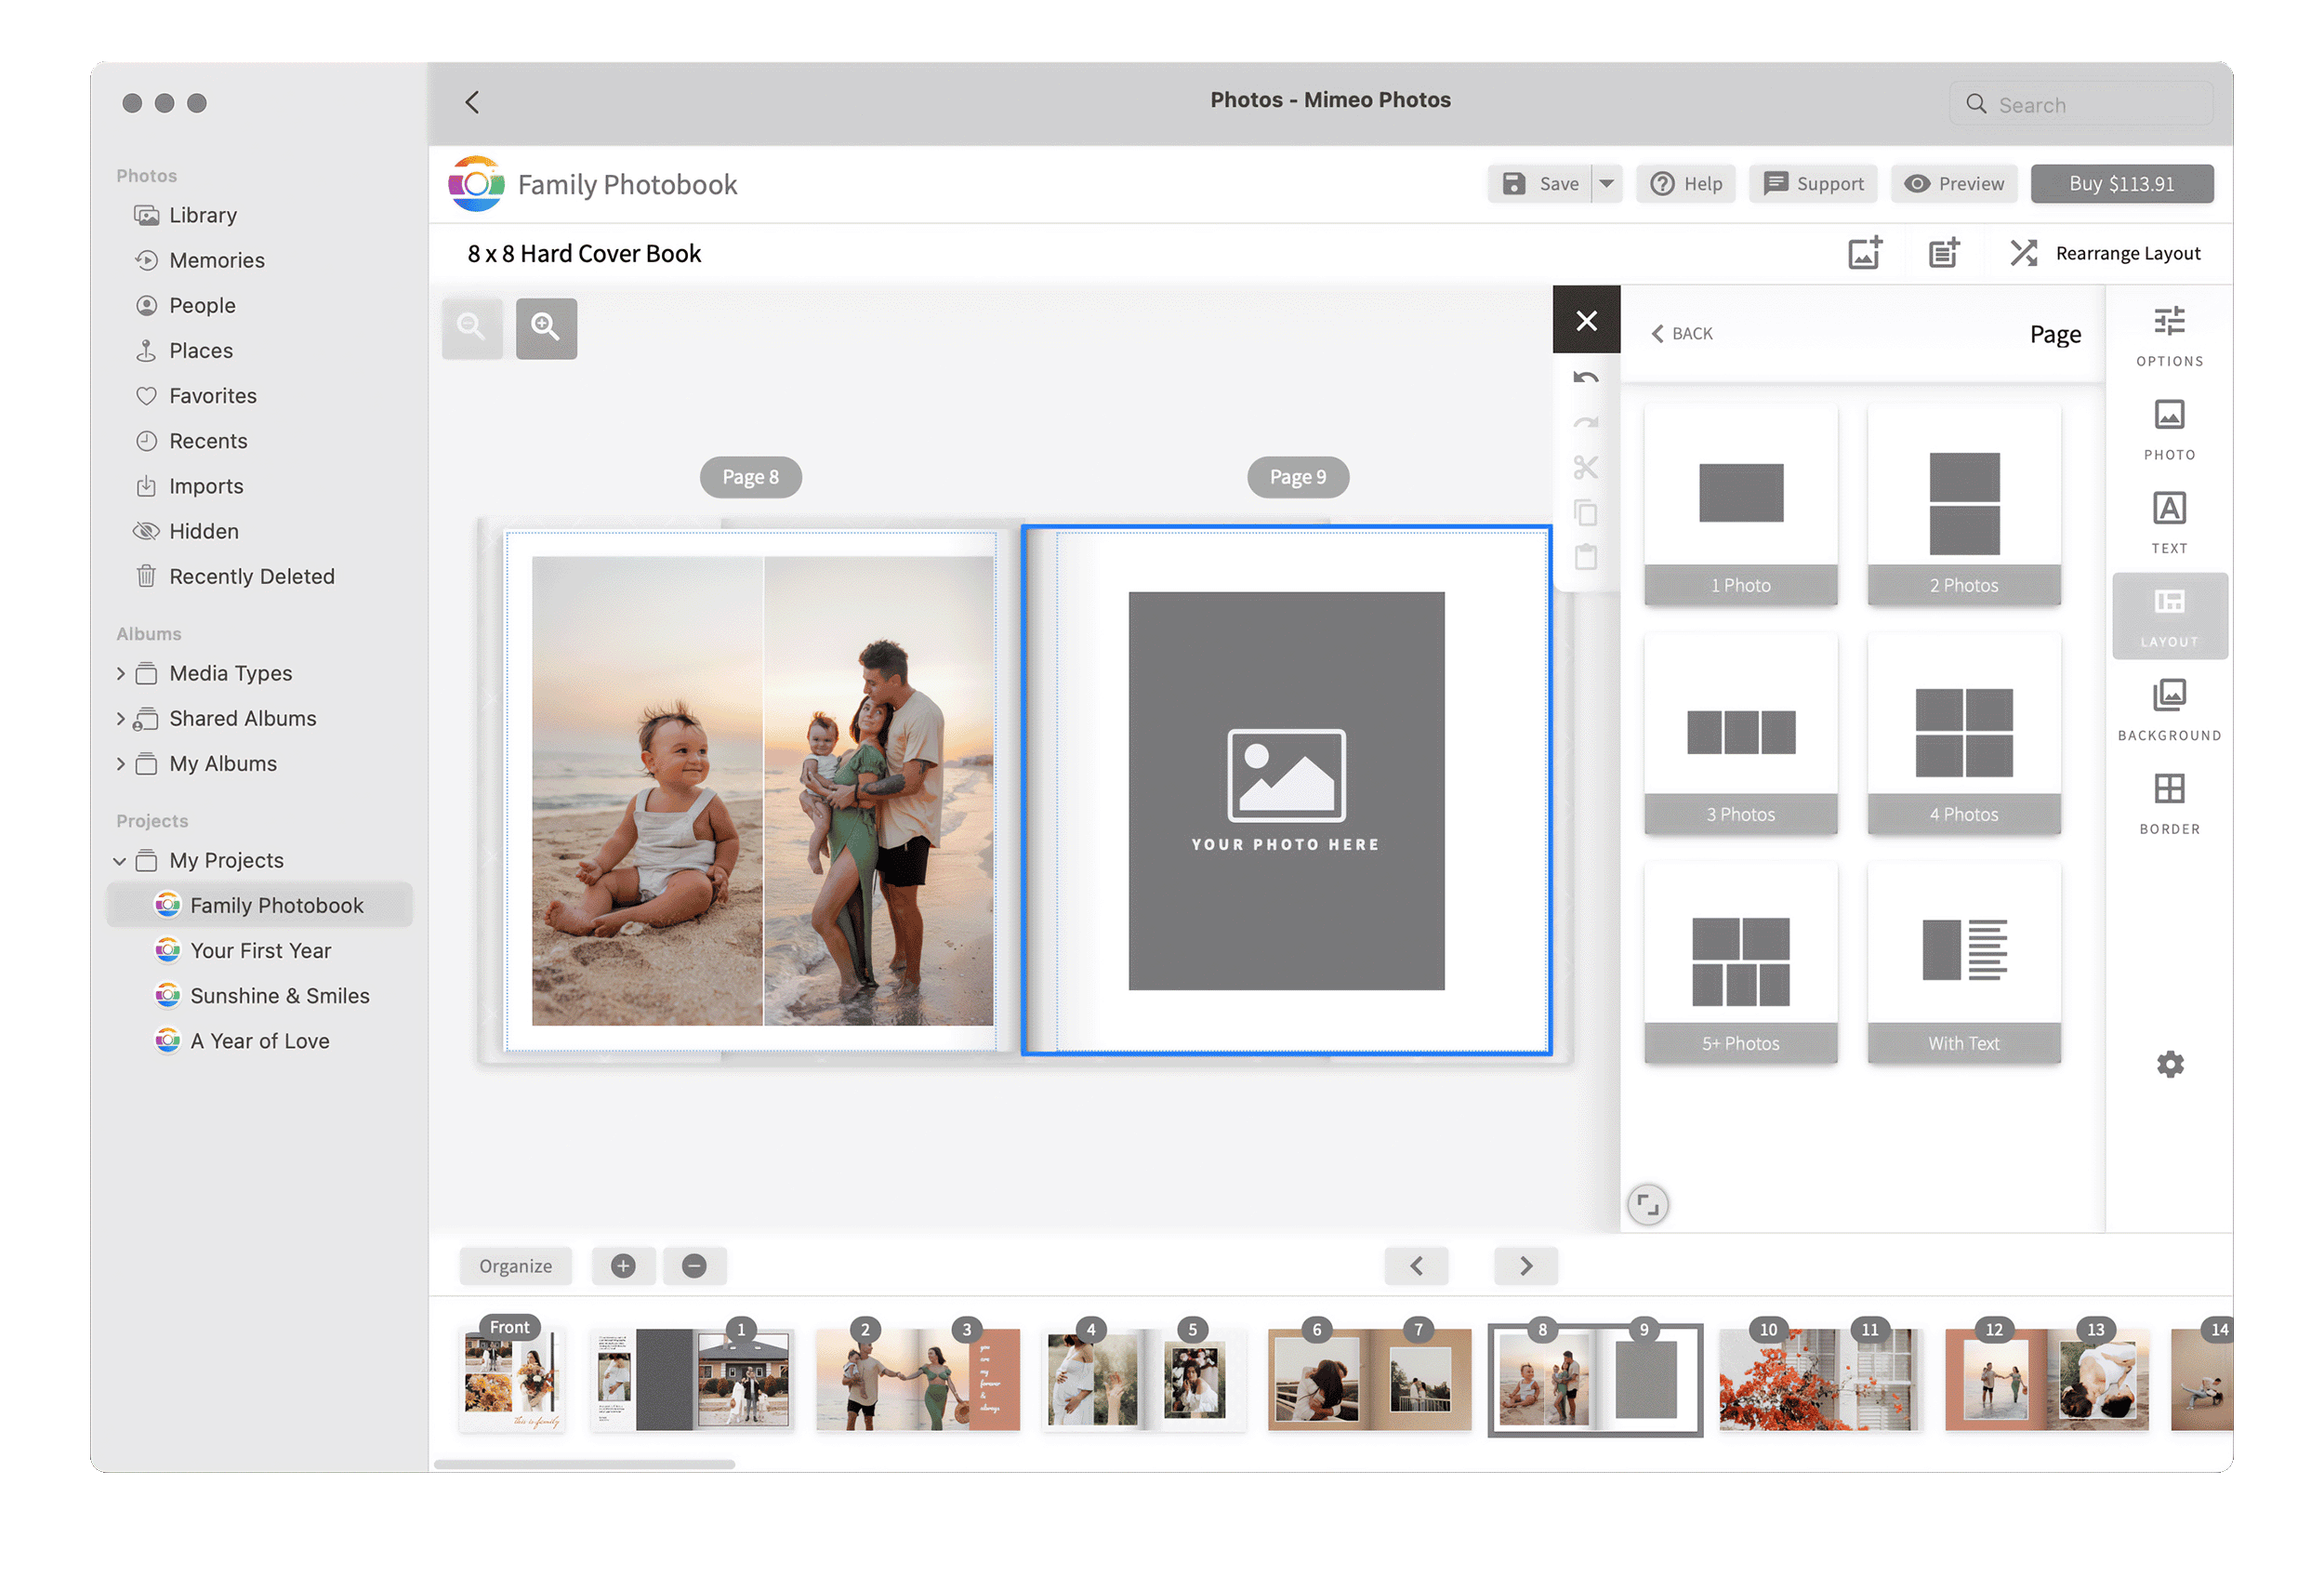
Start by using the Layout tool to select your preferred page format. We recommend selecting a layout from our 1 photo offerings. Once you’re happy with the layout, fill the empty photo box with your background image.

Step 2
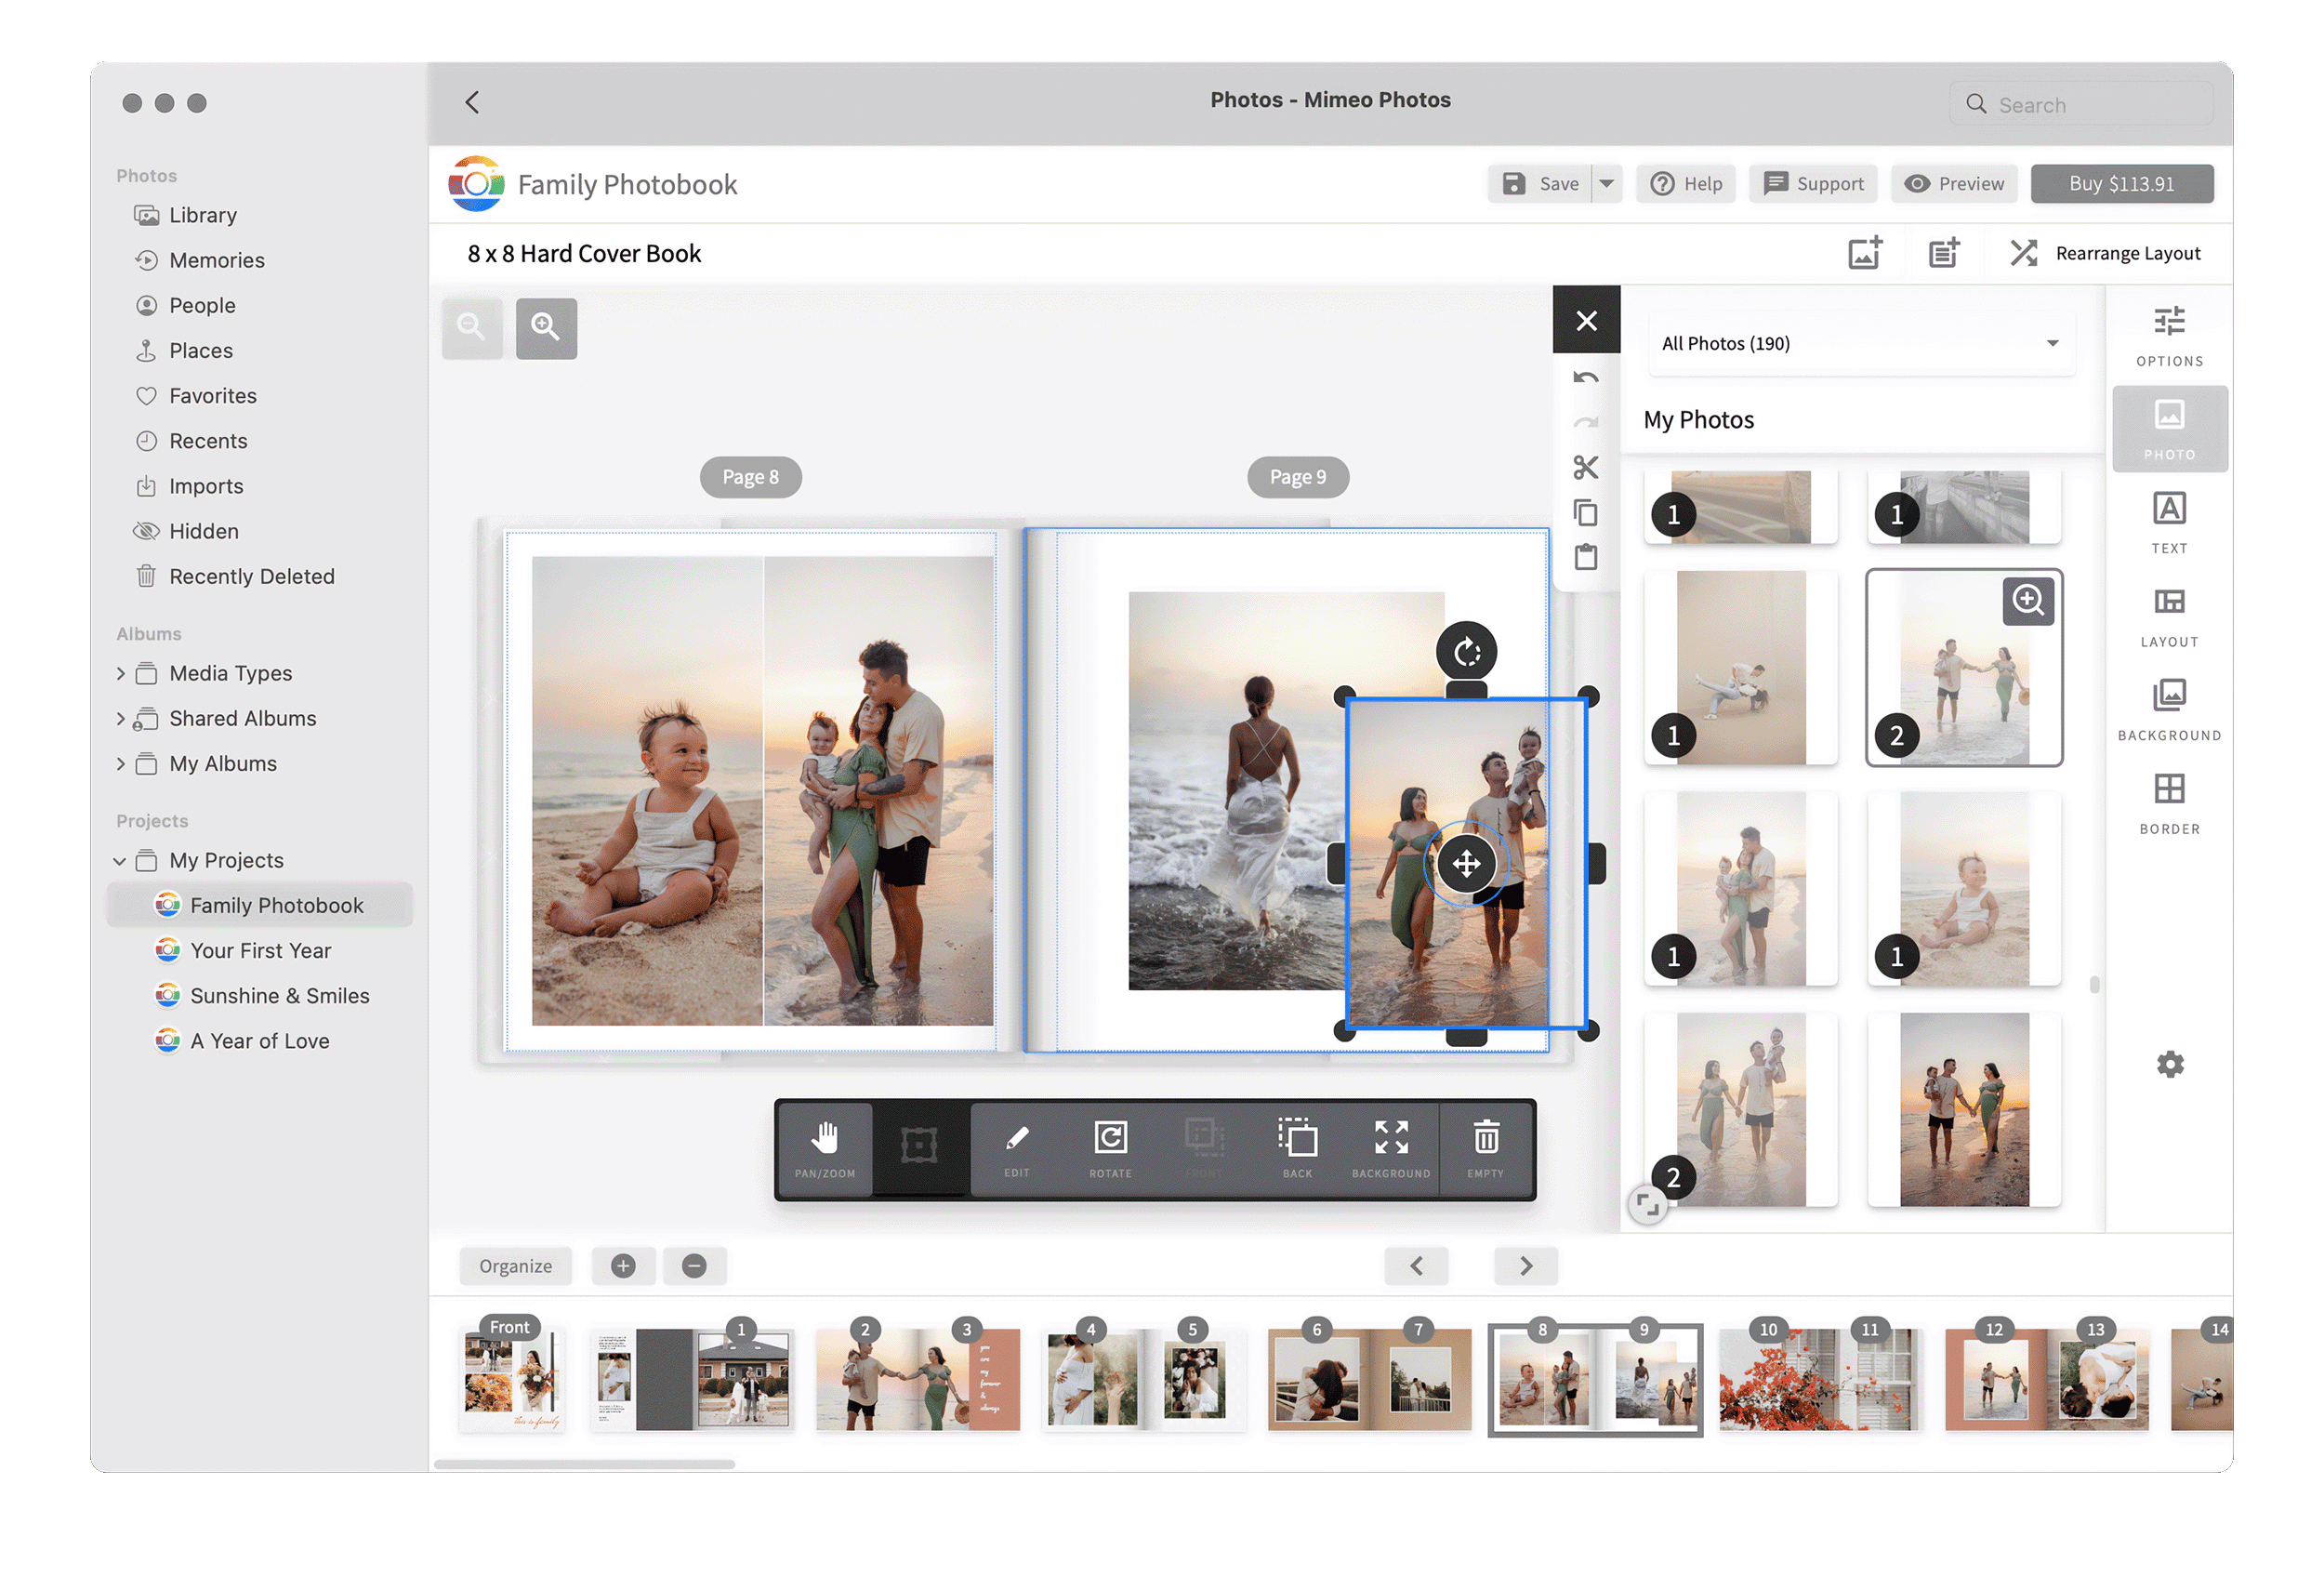
Then, drag and drop your second photo onto the page next to the original to avoid replacing it. You can then center your images using the Transform tool and make any necessary size adjustments.

Step 3
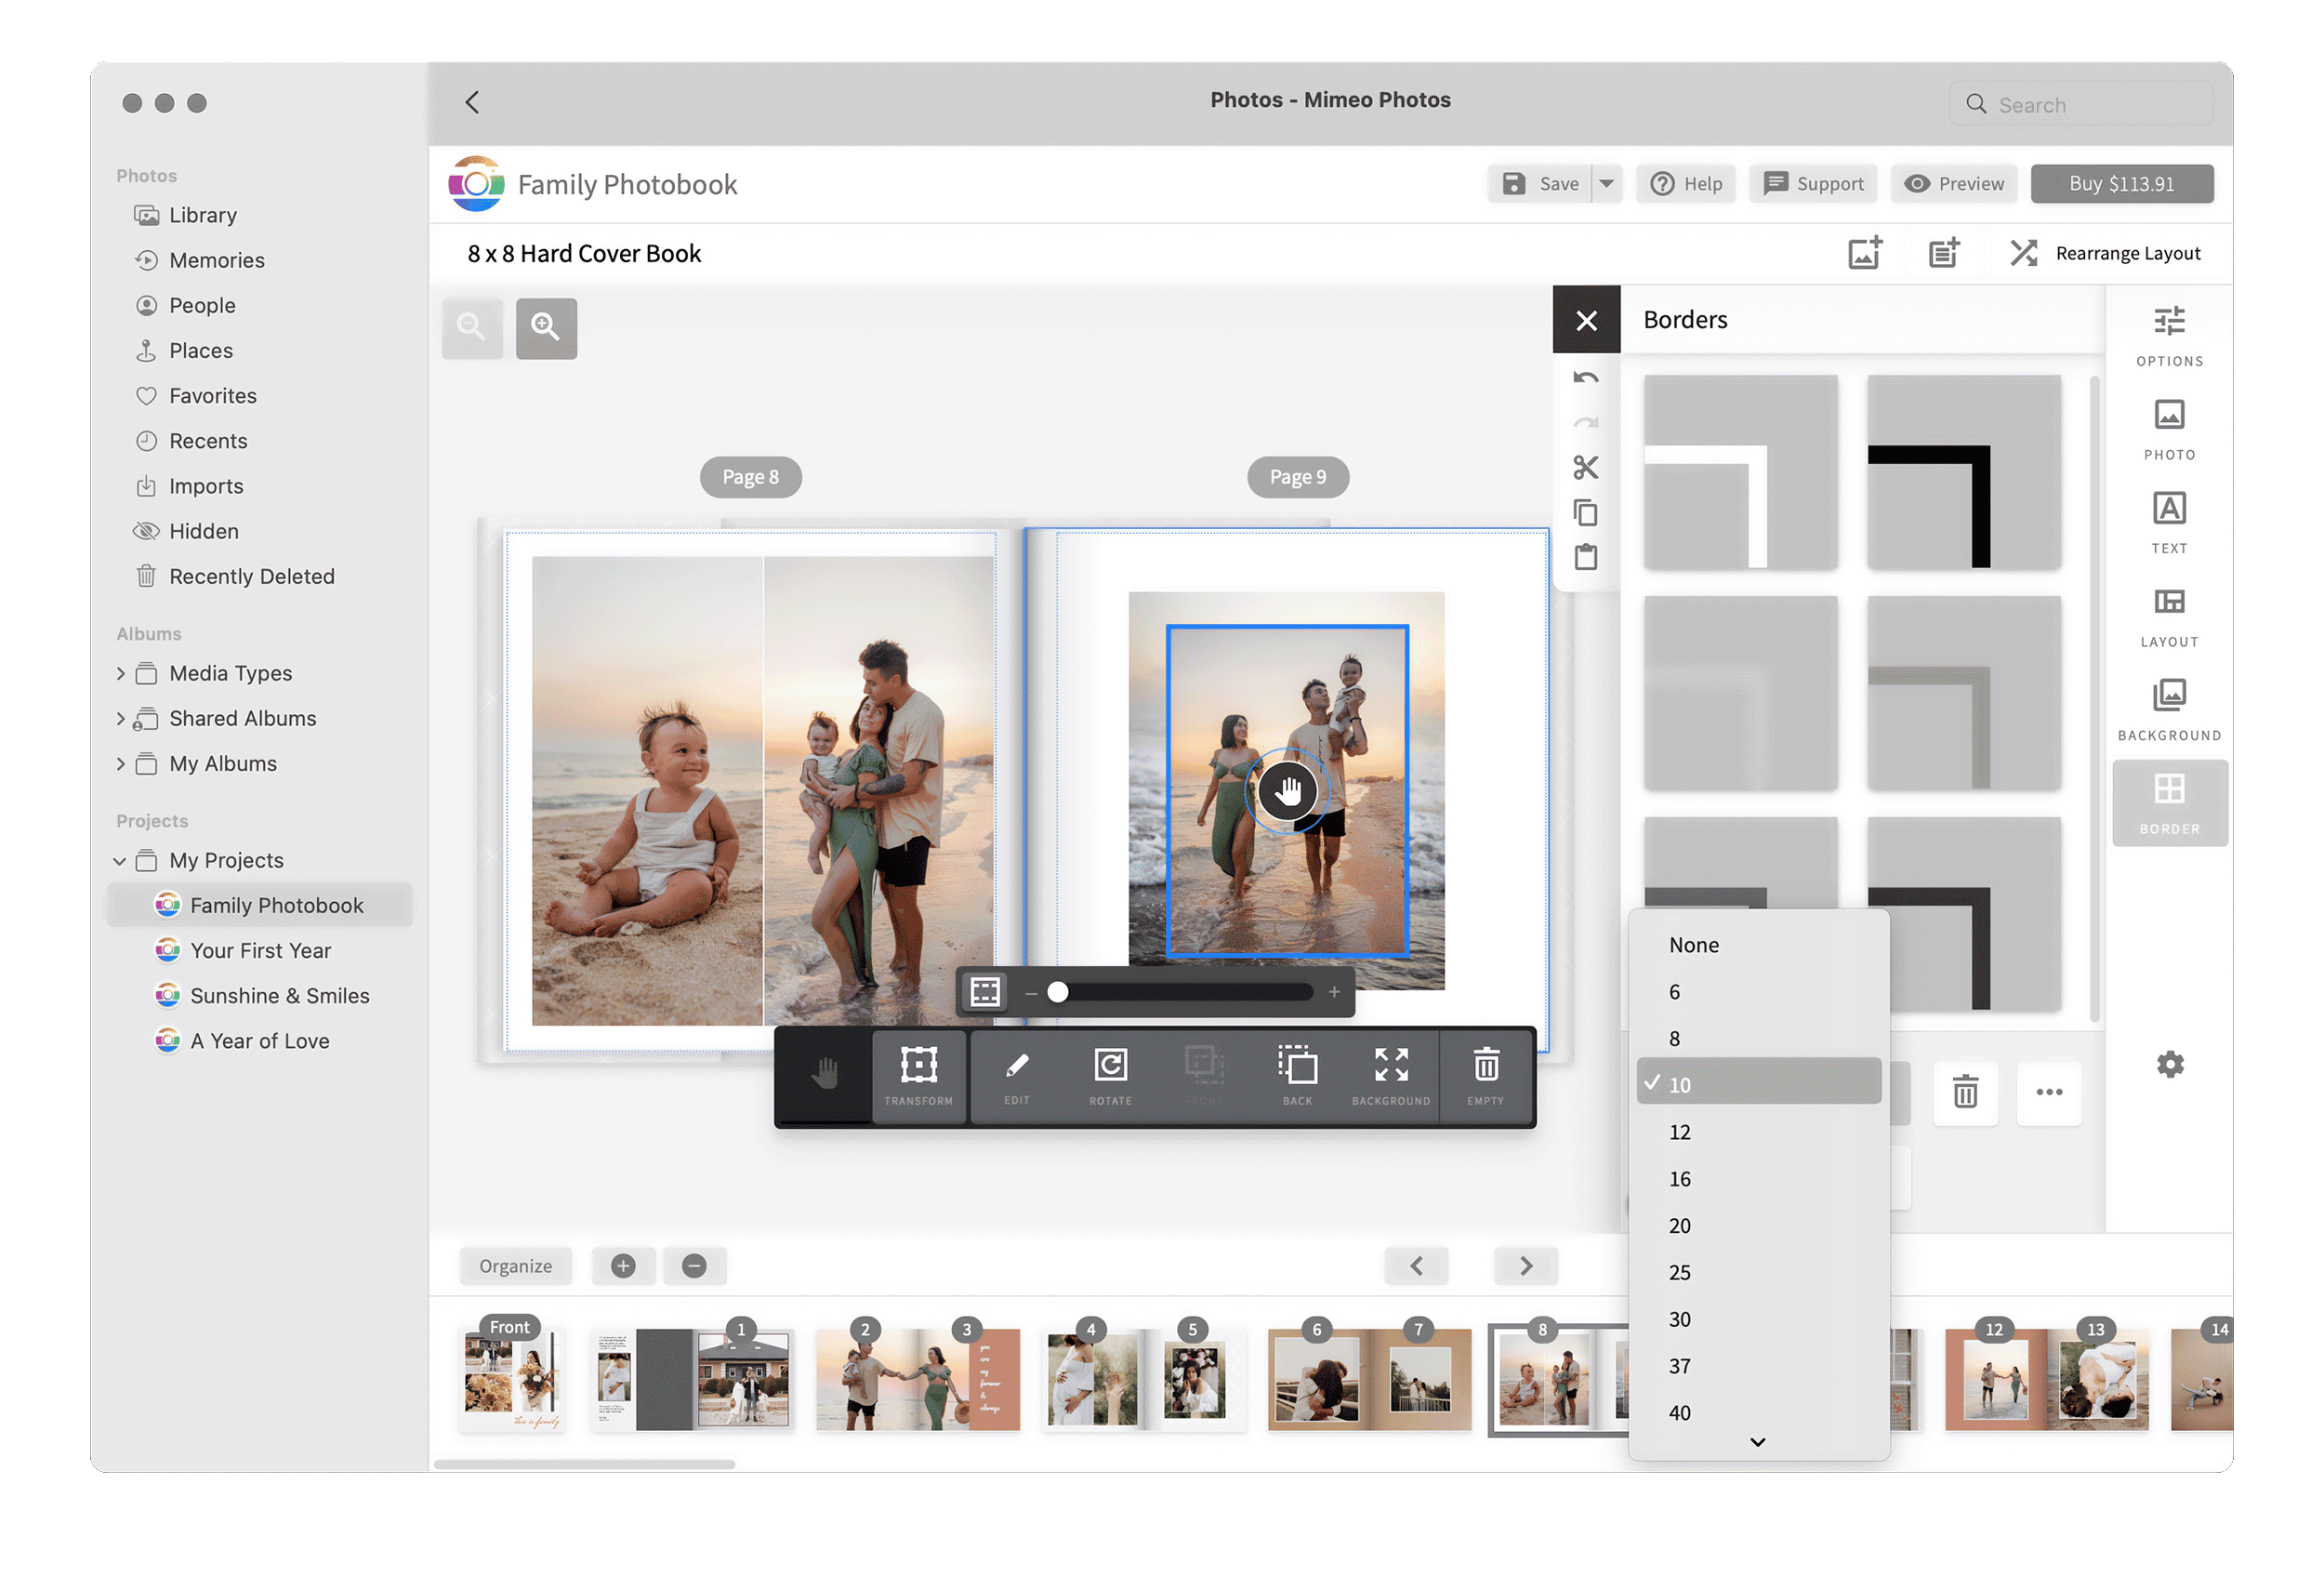
Visually separate your photos by adding a border to the top image. To do this, click on the top photo and select the Border tool. You can adjust the border thickness and color – this looks best when you choose a border color that complements the colors in your photos.
And you’re finished! Try out this technique on your next photobook project.


